Saturday, December 31, 2011

2011 Riding Totals- Here's to 2012!

I've been tracking my miles since '04. Every year right around New Year's I record the DIST2 and zero out each speedometer. It's always a good reminder of how much time I actually put in towards my riding goals for the year.


This year with Elliot in the house I'm going to have to put in a more concentrated effort. He should be old enough by the end of the summer to strap on the back of the big dummy (in a baby seat, of course) and take him out riding.

(example of a Pea Pod on a Big Dummy)


With studded tires, cold weather riding gear and lights I hope to keep on riding to work through the new year. I'm also planning on entering the Dakota 5-0 for 2012- perfect motivation to ramp up the miles. I also really want to improve my technical skills. I don't know if I'm going to have to build a few stunts in the back yard to practice on, but I need to get organized and put some real effort into it.

In any case, here is to a great 2012!

Sunday, December 11, 2011

Fixing Kitchenaid KUDS01FLSS6 Dishwasher

This is round 2 of a rather crude DIY fix for our KitchenAid dishwasher. We noticed that our dishes just were not getting clean, and there was lots of particulate left on the dishes after washing. We first tried removing the spray bars and looking for any clogs- nothing. We took apart and cleaned the filter screens in the bottom of the tub, also to no avail.

This dishwasher has a two position upper rack. There is a set of rubber seals that only allows water to flow out of the proper hole to the upper rack. We noticed that the rubber seal that shuts off water flow to the lower hole didn't seem to be sealing properly. Rather than spending the money on the replacement part on the chance that was the issue, we decided just to seal it ourselves with some aluminum ductwork tape to see if that was indeed the problem. We disassembled the seal, applied tape, reassembled, and ran the dishwasher. Quite to our surprise, it actually seemed to work. The only disadvantage is that you can't lower the rack to the lower position.

Fast forward just over a year later, and the aluminum tape finally failed, and the dishwasher was up to its old tricks. This time, I decided to make the fix a little more permanent by inserting a small piece of plastic cut from the lid of a dishwasher safe container to form the seal. The combination of aluminum tape plus the small piece of polypropylene should make the fix permanent.

Aluminum tape over lower water outlet. Make the tape wrap around the edges of the part, but not so far as to obstruct the snap-fit features. If the snap-fit features are covered with tape, the cover won't snap on properly.


Polypropylene insert between rubber seal and plastic cover of water outlet. (only visible through circular cutout in rubber seal) You can pull the rubber seal out and use it as a pattern when you cut the polypropylene insert.

"outside" view of water outlet, polypropylene insert visible in lower outlet. This is before re-assembly.

Re-assembled water outlet before installation into dishwasher

All parts assembled and back in the dishwasher. You can see the lower water outlet is now permanently blocked

Winter is here, and studs are slow....

Took the Big Dummy out for the first spin with its new sneakers. 19.1 miles, and the incredibly fast 11.7 mph average speed. It turns out the studded tires really suck the energy, particularly on pavement. For some reason they don't seem to be any worse than normal tires on hard pack snow, though. They did work well- I didn't have any issues on any of the icy sections, even on climbs. You could feel some small amount of slipping, but nothing like what you'd get with normal tires.

I met John on the paved trail on the west side of 494, then we headed over to Minnetonka to have some coffee. All in all, a fun ride.


Funny how the 29'er makes even the Big Dummy look like a kid's bike!

Friday, December 9, 2011

Surly Big Dummy all dressed up for winter

I just installed some Nokian Mount and Ground 1.9" 160 studded tires on the Big Dummy. I'm hoping to keep riding in to work, no matter the conditions. I've never tried studded tires before. These things look like they'll make a huge difference. Not only will the studs help, but the rubber is also super tacky and there are wide gaps between the lugs for shedding snow chunks.

I took the liberty of putting the bike on my bathroom scale- standing it up on the rear wheel. With the studded tires and light setup it clocked in at a round 50 pounds. Ouch. No wonder why it was a little tough to get out of the work stand! At least it'll be great training for spring.


Riding to work in the winter beats driving even more than in the summer, at least in my opinion. Every ride is an adventure. Plus, there is nothing like riding home with the trail lit up by your lights and being surrounded by twinkling reflections from each falling snowflake.

Tuesday, December 6, 2011

DIY Wooden Beer Case

I'm on the Instructables weekly mailing list, and a couple months ago I saw a neat project someone had built- home made wooden beer bottle cases. I thought this would be a great Christmas gift for my brother, who is an avid home beer brewing enthusiast. Shh, don't tell....

The instructable project was nice project, but I thought for a gift I needed to kick it up a notch or two. For one, the referenced project used simple screw and glue construction to join the four sides of the case together. That works great, but isn't the prettiest. I thought I'd try dovetailed joint construction instead. I've never tried it, but I thought it would be a great skill to learn. It also a much nicer looking and stronger joint.

I picked up a General Tools dovetail jig from Home Depot. It's pretty basic, but much cheaper than a nicer setup from Rockler. Since the sides of the crate are 12" tall, you have to reposition the jig three times per side. A bit time-consuming, but not a big deal. Once the board is clamped in the jig, you use the included router bit to form the "tails" and "pins" of the joint. I chose to use a half-blind dovetail, with the exposed tails on the handle side of the beer crate.


I sized the crate to fit 12x standard beer bottles. I discovered shorty Sierra Nevadas don't fit, but anything "normal" will fit fine. The sides are constructed from 1"x12" pine, and the bottom, sliding cover, and internal dividers are made from 1/4" birch plywood.


The internal dividers are cut from 1/4" birch plywood ripped to 6" tall strips, cut to length, then notched so they lock together. I didn't glue them together or to the box so they can be easily removed if necessary.

Crate 1 of 2 ready for finishing!

To finish it off, I'm planning on using T-shirt iron-on transfer paper to print out some custom brewery decals and iron them on to the wood. That should really add some nice personalization to the project. There is a nice article also on Instructables about this technique

Tuesday, November 29, 2011

Getting more life out of a 1997 Niterider Digital Head Trip

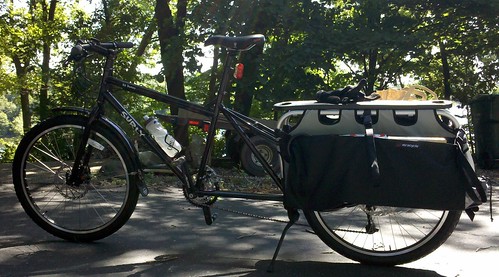
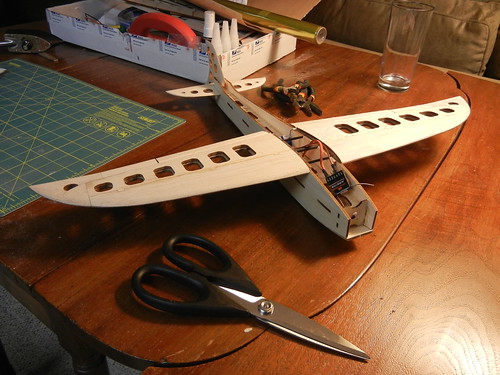
Now that I've gotten into electric RC airplanes, I have plenty of decent LIPO batteries and their assorted chargers around. This greatly simplifies making a LED bike light- now I just need the light itself, and the associated electronics to drive the light. I'd like to break this project into two components:

1) Build a device to allow me to drive my existing old-school 6V Niterider digital head trip lights off of 7.4V and 11.1V LIPO batteries. This will include a voltage regulator and a low voltage cutoff to prevent the LIPOs from being over-discharged and damaging the batteries.
2) Source appropriate LED lighting system to drive with the LIPOs.

So, my old Niterider is a 6V model, with maximum 15 watt power usage. (from my memory of the advertisements, not actual measurements)

Using P=V^2/R, and V=IR:

R = .42 ohms
I = 2.4A

A possible method to both regulate the voltage and protect the battery packs would be to use a UBEC. Hobbyking has one potential model: http://www.hobbyking.com/hobbycity/store/uh_viewItem.asp?idproduct=2160. This product can output either 5.0v or 6.2v depending upon jumper setting, plus it is capable of 4A current draw and has a low voltage warning buzzer. And it only costs $11.25.


This seems like a good solution to me. Cheap, easy and simple! 

As part of an order from Hobbyking for some RC airplane parts, I added a UBEC to try with my existing bike lights. I ended up ordering a different unit than I specified in the previous post- I went with this one instead: TR-UBEC15. It was a couple more dollars, but it has a much higher current capacity as well as being in stock.


Converting the UBEC to power the Niterider Digital head trip was easy- but ultimately unsuccessful.

Step 1: Cut off stock connectors off of UBEC and solder on EC3 (to connect with my LIPO batteries)


Step 2: Cut open old, worn out Niterider NIMH battery pack to recover the cord:


Step 3: Solder the NiteRider power cable to the UBEC output. 

The NiteRider plug is a "N" style plug, available at your neighborhood RadioShack. It's also center positive. In my cable, the white wire was the center positive, and the black was the outside ground. The red wire was unused. The colors may vary, so be sure to use a voltmeter to double check which lead is correct.


When everything was soldered and insulated with heat shrink- I did a quick short check then fired it up. It worked just fine- unfortunately the UBEC didn't deliver 6V- it was closer to 5.8V. The NiteRider Digital head unit didn't like that, and registered it as a flat battery and went into the low power "limp home" mode.

Bummer. Next time I place a Hobbyking order I'll try another UBEC, and hopefully I can find one with a specified higher voltage output. This might be a good option- 7.2V output- will overdrive the bulb slightly but should avoid triggering the head unit low voltage error. 

FYI, I finally ordered and soldered together the new UBEC (which works). See the post HERE.

In the mean time, I made a simple charge adapter to allow my RC battery charger to charge my old NiHM NiteRider batteries. It just a Type N power socket (from RadioShack) connected to an EC3 connector.


It works great. The big advantage is that the charger is programmable- so I can have it run multiple discharge-charge cycles automatically to cycle the battery pack. This is particularly important since the packs have been sitting around half-discharged for the last year or so.

Monday, November 21, 2011

Lake Level Sensor- Success!


I was able to get the lake sensor system to successfully push data to google docs: LINK


The “lakelevel” is the distance in inches from the sensor to the lake surface. I need to change this to lake height above sea level in feet and inches. I also need to add some sort of smoothing function to remove ripples and waves from the output. The water temp is in degrees F. (not working correctly at the moment) The photocell is relative sky brightness- 0 is no light, 1000+ is full sunlight. Air temp is in degrees F, and air RH is relative humidity.

I’m having some sort of hardware issue with the lake temperature probe- you’ll notice the anomalous reading in that column. Right now it’s sending data to google docs every 10 minutes. Once I figure out the water temperature probe, I’m going to add some data visualization -graphs over time + a graphical current status icon - then attempt to send those to the Mooney lake association website.

Also, the current code is a resource hog on the host PC. I need to dramatically reduce CPU use and then export the application as a stand-alone executable. Right now it's running from the Processing development environment. 

It's been a very interesting project- a great excuse to dive a bit deeper into hobby electronics and programming. 

Monday, November 7, 2011

Lake Sensor Project: Software

I'll admit that my software experience is pretty limited- mostly some classes way back in college. Not that this sensor package is anything terribly complicated by any standard, but it's been a nice learning experience. It's also been challenging, especially with a new crying baby and lack of sleep making concentrating on a new subject difficult!

So, at the moment the sensor package is transmitting data just fine. Originally I wanted the sensor package to transmit a packet of data only when requested. This worked fine when I had the PC and the Arduino directly connected via a USB cable, but this didn't seem to work with an XBee wireless module sending the data through the ether. I'm sure this is an easy problem to solve, but my limited web surfing didn't track down an obvious solution. To work around this I decided to have the sensor package continuously transmit data, at least for now.


The picture above is the raw data being fed into my laptop, after been wirelessly sent from the lake sensor to the XBee module. As you can see, it's just a list of numbers currently, delimited by commas. Here is what they are:

ultrasonic sensor, ping time to lake surface and back in milliseconds,  water temperature in degrees C (obviously not right, something needs to be fixed there), photocell resistance (lower numbers = darker), air temp in degrees C, relative humidity.

The next steps are:
  1. write some code to import this data into a usable form (probably using the free language Processing). Make Magazine seems to have a great tutorial on this.
  2. convert data into proper form- millisecond ping data into lake level in feet above sea level, temps converted into degrees F, etc.
  3. send the data into a google docs spreadsheet
  4. send to Mooney Lake association website

Saturday, November 5, 2011

Lake Sensor Project: Hardware Construction

Bare PVC Electrical Box


Drilling holes for ultrasonic distance sensor

Ultrasonic sensor, DHT22, and plug for thermistor installed:


All sensors are fixed in place and holes sealed with hot glue. The box should be essentially water tight.

Sensors wired to external daughterboard (for mounting pull up, pull down resistors for various sensors)

Daughterboard connected to XBEE shield via ribbon cables

Boards installed in box w/ self adhesive velcro. 


The hardware is essentially done. Eventually I'd like to set up a battery and solar powered system. Having an extension cord run down the hill to the dock is a little kludgy. Ideally I'd use some old RC airplane lithium polymer batteries that can't supply enough current to fly aircraft well any more, but would still work fine for this application. However, LIPO batteries need specialized charging circuitry that would require more research than I have time for right now.


Lake Sensor Project: Bill of Materials

Hardware top level description:

This project consists of two main hardware assembles:
1) Sensor package attached to dock with wireless data transmission
2) Wireless data receiver module attached to PC

I used the Arduino because I had one on hand. This particular model isn't manufactured any longer, but any of the newer models should work fine.

There are all kinds of rube-goldberg ways to measure lake level. I felt an ultrasonic distance sensor would be a good way to measure the lake level with no mechanical complexity. They are also fairly cheap, particularly off of Ebay. The HC-SR04 didn't have great examples online on how to implement the code, but I used some code examples off of Adafruit's excellent website and modified them for the 4-pin HC-SR04 vs. the models Adafruit carries.

The other sensors are pretty self-explanatory, I chose them for a nice balance of price vs. accuracy.

I had a hard time deciding whether to go with wireless data transmission, or wired. There are several ethernet options available for arduino boards, some of which even support power over ethernet (POE). POE would be particularly cool, since then I wouldn't have to run separate power and data lines down to the dock. POE vs. XBEE data transmission were about the same price. The decision point for me was lightning risk- running an ethernet cable down to the dock would expose my home network to a might higher risk of damage from nearby lightning strikes.

The enclosure is off the shelf electrical components from Lowe's.

Sensor Package Bill of Materials:

Item P/N Source Quantity
Arduino Duemilanove N/A www.adafruit.com 1
Ultrasonic distance sensor HC-SR04 www.ebay.com 1
Precision Epoxy Thermistor N/A www.adafruit.com 1
Air Temperature / Humidity Sensor DHT22 www.adafruit.com 1
Photocell N/A www.adafruit.com 1
X-Bee Shield WRL-09976 www.sparkfun.com 1
X-Bee Pro, Series 1 wireless data module (100mW power) XBP24-AWI-001-ND www.digikey.com 1
Printed Circuit Board, general purpose 276-150 Radio Shack 1
6"x6"x4" PVC outdoor wiring box N/A Lowe's 1
Redodot wet locations hinged outlet cover N/A Lowe's 1

Note: many misc. components were not included- headers to solder on to X-Bee Shield, ribbon cables, connectors, etc.


Wireless Data Receiver Bill of Materials:

Item P/N Source Quantity
X-Bee Pro, Series 1 wireless data module (100mW power) XBP24-AWI-001-ND www.digikey.com 1
X-Bee Explorer USB WRL-08687 www.sparkfun.com 1

Initially this data receiver will be used bare, but eventually it should be placed in an enclosure and placed somewhere safe and out of the way.

Lake Sensor Project - Sensor Package Installed!

It's been a while since my last post. We've been very busy with the new baby. Every once in a while I've been able to sneak off and work on my new project- a sensor package to remotely monitor various environmental states of Mooney Lake. I've finally be able to get it up and running, and it's now attached to the side of the dock and transmitting data.

Goals:
  • Remotely monitor lake level, lake water temperature, air temperature and air humidity. I also attached a photocell to measure ambient light levels just for the heck of it.
  • Log the data, push it to the "cloud", and graphically display it on the Mooney Lake website. 
Current Status:
  • The sensor package appears to be working, and it's transmitting data to my laptop in the house.


Next Steps:
  • Write some code in Processing or Python (I'm not sure which yet) to push the data to Google Docs. My initial plan is to use Google Docs to log the data and generate graphs depicting trends over time. I'm hoping this will be the easiest method to create graphs that I can then pull into the Mooney Lake website. An alternative would be to directly create the graphs using Processing, save this as a .jpg then drive the .jpg to the Mooney Lake site.

Friday, August 12, 2011

Sometimes lunchtime flying doesn't go as well as you'd like...


I had some not-so great results flying today at lunch. I switched the P-51 out to a 8x8 prop last night. I had one good flight- and man, was it awesome. The amount of extra speed generated when I transitioned from a 10x5 to a 8x8 was amazing, and it still pulled just under 60A in static full throttle testing. That airplane was totally ballistic. Very solid, maintained speed extremely well, and the highest top speed I’ve seen yet. Probably even faster than last summer when I flew it a few times with John's 1550 mAh 4s battery. Well, on flight #2 I didn’t get a good enough launch, stalled it, and pile-drived it into the ground under full throttle. I haven’t determined if it’s fixable or not, but the fuse broke in 2 places, munched the prop to stubs, and possibly cracked the wing. One take away is that launching with a smaller diameter higher pitch prop is more challenging, as it doesn’t accelerate out as quickly.

Then, I turned to the babyshark, and did almost exactly the same thing. Poor launch, stall, almost recovered it, regained enough altitude so when I lost control it nose-dived into the ground at high velocity. The damage isn’t too severe- separated the firewall from the nose, and crunched the forward bulkhead. I’m also not sure about fixing this again. I feel like I should continue to fix, fly, and repeat until I get at least one passable flight, but I am getting a little discouraged. Next time I’m going to try flying it with a smaller battery to lower the stall speed.

Sunday, July 3, 2011

Surly Big Dummy mini-Review

Last week I sold my cyclocross bike / commuter and bought a 2011 Surly Big Dummy. Crazy, I know, but I thought it would be sweet to have a bike that would allow no excuses not to run all possible errands on the bike. Considering the Big Dummy has a listed cargo weight limit of 200 pounds, even picking up four bags of water softener salt is a doable errand.

Surly Big Dummy

So far I've only ridden it home from work and one trip about town and back home from the grocery store. The photo above shows it fully loaded with the items below. During this last trip I carried:
  • 21 pound bag of cat litter
  • 2x 12-packs of coke
  • bag of misc. groceries and cleaning supplies.
Not bad for a first trip. This bike handles surprisingly well even with a fair amount of weight. On the way back we detoured through some rougher bike trails and it did well. I'd consider even trying to ride Theo on it, although popping the front wheel over obstacles would be challenging to say the least!

My only negative so far is that when in the granny gear the two mile long chain drags across one of the frame members. I'll have to get some clear protective tape or old tire sections to protect the steel.

Another bonus is it may be possible to run snow bike tires and rims on this beast- with the super long wheelbase I bet it'd be very stable on rutted-out snowy trails.

Monday, June 20, 2011

Father's Day Flying

John and I were able to get out on some fun and destructive flying last night. Key flights include the maiden of my Balsa Baby Shark ( and promptly put it back in the shop ), and John's encounter with the Vortex of Doom with his E-Flite T-34.


Balsa Baby Shark


Looking at the video, I didn't have a very good launch. I did a weak toss better suited for an overpowered beast like my PZ P-51. I didn't dare launch the Babyshark at full throttle- so it was no more than 1/3 throttle during the entire short flight. I think it needs a hard, flat hand launch. Next time I'll also try it during a time when half the pattern isn't into the sun either. Luckily the damage was minor- broken prop, and the forward bulkhead was crushed by the battery. Both easy fixes. 

T-34 Aftermath

John's T-34 might not be quite as easy to fix....

But, I did manage to get the best flight out of my Tricopter yet.


The electronics seem to be pretty well sorted out. The tail rotor yaw mechanism isn't as robust as I'd like, and I also need some better visual markers to tell which way is "front".

Monday, June 13, 2011

Tricopter DX6i, AR6110 final setup

After lots of experimentation, I finalized my tricopter setup. I was origionally working from the setup guide on RCexplorer.se's website. His setup was for Futaba radio systems, and since I am using a Spektrum DX6i and a Spektrum AR6110 receiver my setup turned out to the slightly different.

These settings seem to work fairly well- it's obvious the limitations now are my piloting skills. I really need to attach a body or something so it's easy to tell which end is "front"- it is very easy to lose directional orientation!

NOTE THESE ARE DIFFERENT SETTINGS THAN MY EARLIER BLOG POST!!! I kept the original blog post active for reference only

AR6110 Receiver Connections:
(note gyros are in-line with connections between receiver and ESC or servos)

Channel Receiver Label Servo / ESC
1 Throttle Tail rotor gyro gain
2 Aileron Left rotor ESC
3 Elevator Tail rotor ESC
4 Rudder Tail rotor servo
5 Gear rotor gyro gain (split 3 ways)
6 Aux Right rotor ESC

The tail rotor gain is attached to the Throttle channel. If you had a 7 or more channel radio, you could attach this gain to another auxiliary channel with a seperate switch. Since I only have a DX6i I don't have this luxury. Since the radio is in helicopter mode, you can set your gain using your throttle curve. It's a pain to adjust your gain, but it works. To change your gain you have to adjust the throttle curve across all points- meaning each time you have to change the gain you change each of five location on the throttle curve to the gain setting you want.


DX6i Setup after several somewhat successful flights
(I need to work on my multi-rotor heli skills!)


Adjust List

Throttle Curve (tail servo gyro gain) = 95% (heading hold mode) at all points
intent: if gain is 0-50%, gyro is in rate mode. if it is 50-100%, it is in heading hold mode. The intent here is for the tail servo (yaw) gyro to be in heading hold mode. As far as I understand, lower numbers = higher gyro gain. This setting seems to produce a pretty rock solid heading hold, perhaps a bit of over correction.

Gyro: (gain for the 3 ESC gyros) = 35%. Seems to be fairly stable without too much overcorrection for my setup. Again, keep it under 50% so it is in rate mode, and lower numbers equals more gyro gain. Since the radio is in helicopter mode, the gyro adjust changes the "gear" output on the receiver.

Pitch Curve (normal)
Position Setting
L 0%
2 40%
3 50%
4 70%
H 100%


Dual Rate & Expo
Function Mix
Aileron 80%+20%
Elevator 70%+20%
Rudder 94%+inh

Swash Mix
Function Mix
Aileron +40%
Elevator -40%
Pitch +100%

Setup List

Reverse
Function Reverse?
Throttle N
Elevator N
Gyro N
Aileron R
Rudder R
Pitch R

Swash Type
CCPM 120 degrees

Why isn't balsa more popular?

Since Anna's been going to bed early every night because she is working hard growing a baby, I've had time to work on a number of different projects. I think people avoid balsa kits because of the time required for assembly- especially compared to quality balsa or foam ARF models - but I think there is a lot of satisfaction in actually building something. I also seem to have more time available at night at home vs. time available to actually go flying. For a beginner, though, nothing beats a foam ARF which you can repair in ten minutes with hot glue and packing tape. Balsa is a lot less forgiving.

Nanoplanes.net Balsa Baby Shark

Nanoplanes Balsa baby Shark just about completed

This is a first class product. (and I haven't even flown it yet) Top quality instructions, clever design and easy construction. In particular I really liked how they have you laminate different pieces of wood together with alternating grain direction for maximum strength. This should be an absolute rocket, I'm hoping for 100+ mph top speeds. I won't maiden this until I can have John help me trim it out at a large field.

In static testing the motor pulled 26.5 amps with a APC 4.75 x 4.75 prop.

Components Used:


Mountain Models Mini-Flash

Mountain Models Mini-Flash

This was a fun build. All precision laser-cut balsa, the kit included a very complete hardware package.

It went together fairly quickly. The directions were not quite as good as the Baby Shark, and it would have been helpful to have alternative motor mounts available. The plane was designed for a GWS gear drive system with a stick-mount. I used a brushless motor, plus a home-made delrin adapter plate to allow the use of an E-flite brushless stick mount. Mountain Models should also consider updating their instructions to match kit contents better- the instructions state Doculam covering is included with the kit, but it wasn't in mine. Note I didn't mind, as I didn't intend to use that material anyway.

I also had some trouble getting the CG to line up right- perhaps I used too heavy of a covering or excessive glue in the tail. I'd also recommend NOT using CA to fasten the canopy in place- the CA fumes deposited white residue on the inside of the canopy and on my pilot.

However, the end result looks good and flies great. Extremely acrobatic, and I'm still using the recommended low rates. High rates are insane, I'll have to get in some serious practice before I'll be able to fly using them. I also really like how the transparent yellow wings look when in flight.

Components Used:
  • Spektrum AR6110 receiver
  • 2213n 800 kV motor- I originally intended on using this 1200kv motor (previously well used on other aircraft), but accidentally broke several wires when installing the motor. I had this 800 kV motor as a backup for my Tricopter motors, but thought I'd put it to good use here.
  • APC 10x4.7 SF prop. This only gives about 10amps- I will try larger diameter and higher pitch to try and bring this closer to 18amps at full throttle. I'm thinking an 11x7 SF might be a good choice. Even with the 10x4.7 prop the aircraft has nearly vertical performance, and nice long flight times.
  • Turnigy Plush 18A ESC
  • 4x HXT900 servos
  • Rhino 750 mAh, 3s, 20c lipo batteries
  • Coverite transparent yellow iron-on covering
  • Blue econocote iron-on covering

E-Flite Funtana 300
I purchased this acrobatic foamie from Mark last year. It had an unfortunate crash this past winter- nose-first into the ice. I patched it back together with balsa, but it really hasn't flown the same since because of the added weight from all the balsa and epoxy patches. When I built the Mountain Models mini-Flash, I removed the Funtana's Spektrum AR6110 for the new plane. I did purchase a few of Hobbyking's new RA61E 6 channel 6110 knock-off receivers. I was a little skeptical about their quality so I certainly won't put one in a balsa model, but it was a perfect receiver to put in the Funtana which is now somewhat disposable. I flew it for a couple batteries last night, and the cheapo receiver seems to bind and function just like the AR6110 origional, but only 25% of the cost.

Monday, May 9, 2011

Tricopter Success!


I'll re-post my settings- I believe they've changed from the last setting summary I posted. Anyway, I'm very close to having the tricopter ready to fly some arial photography.

It is fairly close to stable flight. It still isn't as steady as I'd like, and I need to put in a lot of "up" elevator trim to keep it from putting the nose down and accelerating away, even with the CG set to the exact midpoint of the three rotors. One puzzeling obervation is that the craft seems exhibit the pitch problem less with the CG "behind" the centerpoint of the three prop booms. I'd expect the opposite to occur.

I've also had to do quite a bit of reading on RCgroups to try and understand the tricopter setup, in particular gyro gain setup. (and don't hesitate to correct me if my observations below are incorrect!)

First of all, there are several gyro adjustments available:

1) gyro max travel (screw adjustment)
2) gyro time delay (screw adjustment)
3) gain control (electronic adjustment through separate rx channel)

You adjust the gain by modifying the output of a channel of your RX. Basically, it uses the same PWM signal as servos and ESCs. If you send the gyro a 0% signal, that's max gain. A 100% signal is minimum gain. However, if you send the gyro a signal of 50% or more, it'll be in heading hold mode rather than rate mode. You want the tail servo on heading hold mode and the other three gyros on rate mode. Heading hold mode will try and move the aircraft back to the origional orientation, and rate will simply react to counteract an input acceleration.

Since the tricopter uses two "blocks" of gyros- one three gyro block for the rotors and one block for the tail, you need two RX outputs to control them. I attached the rotor gyro gains to the standard gain channel on the RX (thereby using the heli gyro menu item), then I used the throttle channel for the tail rotor gyro. All confusing as heck and not at all intuitive.

I'm thinking that the following changes will help with flyability:
  • Changing from a 10x5 prop to a lower pitch- this should give the gyros more control as the ESC's will have a smaller output change in pitch inches per prop revolution per ESC step
  • Adding a rear skid so the tail rotor yaw servo doesn't smack the ground on each hard landing
  • Try moving the battery even farther back
  • I'd also like to add more of a visual reference as to which end of the craft is the "front"

Wednesday, May 4, 2011

DIY Sunrise alarm clock

Nice implimentation of a do it yourself sunrise alarm clock. It's a little more from the ground build than I'd do, but it's nicely done.

http://sunrisealarm.sourceforge.net/

Monday, April 25, 2011

Yet another attempt

The gyro reversing and replacing the servo helped. However, it still doesn't behave quite right. I think there is still some changes to be done on the radio setup and perhaps gyro settings.


I tried several flights like this and each was the same. Time to figure out what was going on... I'm also going to do the "hot glue" modification to the gyros to see if that improves the flight performance.

Sunday, April 24, 2011

Tricopter - 3rd & 4th flight attempt

Changes since last flight:
  1. Reversed gyro on right arm
  2. swapped gyro gain channels on receiver

These changes seemed to help. The tricopter would take off without immediately flipping over. However, it wasn't stable on the yaw axis, and would start spinning and translating sideways. I was able to lower it to the ground each time. However, the HXT900 servo I used for the tail rotor wasn't quite robust enough, and stripped out.

I'm going to replace the HXT900 with a parkzone DSV1300M- I believe this is a metal gear servo so it should be more robust.

Saturday, April 23, 2011

TriCopter- 1st two flight attempts

No damage- but I think either the left or right rotor motor gyro is reversed.


Tri-Copter Final Pre-Flight- DX6i & AR6110 setup

NOTE- These were my origional settings, I've since updated the settings and they are posted HERE. These settings listed here may work but I highly recommend using my newer ones as they worked better for me.


The tricopter is finally ready for its maiden flight. I was origionally working from the setup guide on RCexplorer.se's website. His setup was for Futaba radio systems, and since I am using a Spektrum DX6i and a Spektrum AR6110 receiver my setup turned out to the slightly different. Bear in mind I haven't flow this setup yet, but it passes RCexplorer's recommended setup procedure. The gyro gain controls may not be 100% correct. We'll find out soon....

AR6110 Receiver Connections:
(note gyros are in-line with connections between receiver and ESC or servos)

Channel Receiver Label Servo / ESC
1 Throttle Tail rotor ESC
2 Aileron Left rotor ESC
3 Elevator rotor gyro gain (split 3 ways)
4 Rudder Tail rotor servo
5 Gear Tail rotor gyro gain
6 Aux Right rotor ESC

DX6i Initial Setup
(all based upon recommendations from various users on RCgroups)

Adjust List

Dual Rate & Expo
Function Mix
Aileron 80%+40%
Elevator 60%+20%
Rudder 100%+inh

Swash Mix
Function Mix
Aileron +40%
Elevator -40%
Pitch +100%

Setup List

Reverse
Function Reverse?
Throttle N
Elevator N
Gyro N
Aileron R
Rudder R
Pitch R

Swash Type
CCPM 120 degrees

 
Final Picture before 1st Flight

Also before the first flight I purchased a Du-Bro Tru-Spin prop balancer, #499. I initially hesitated paying the money for this tool, but after bringing it home it was obvious it was money well spent. It is a very nice tool, and made in the USA to boot. I'll be balancing all my props and spinners from now on. During some initial tests I was getting a lot of prop / motor vibration so I thought balancing the props would be necessary to keep the gyros happy. It was also vibrating badly enough so the nuts and bolts holding the motor beams in place were vibrating loose.

Monday, April 18, 2011

Z-8's receiver give-away

Another blogger user is giving away some AR500's and other receivers. See his blog: http://z8rc.blogspot.com/2011/04/first-z8rc-givaway-spectrum-ar500-5ch.html

Tricopter Update

Sorry- no photos today!

Last night I fired up the unit for the first time. All three ESC's and gyros will arm and spin. The tail "rotor" and servo seem to work properly. However, the two side rotors do not. Tonight I'll re-check which channel each is plugged into and review the radio programming. I'm also going to try and balance the motors- at least one has a fairly large imbalance that will shake it's support boom at full throttle, and that's with no prop attached.

Monday, April 11, 2011

Ridin' With Doug

I swapped the car for my bike over lunch today to enjoy the great weather. After work, I jumped on the bike and took the Luce Line to meet Doug in SLP. We did a tour of the Cedar Lake trail to downtown. I was bummed that the new Cedar Lake trail section under the Twins Stadium wasn't open yet, so we had to detour around downtown to get to East River Road. We then took the river road down to the U, then swung by Freewheel bike and the trail out of downtown by the crack stacks to the Greenway. Then, the Greenway back out west. I netted out about 32 miles total, ave. speed 14.9. It was great to be out on a nice day!

Sunday, April 3, 2011

First Ride of the Year

Tex, Doug and I had a great first outside ride of the year. At least for me, it was the first ride. Tex and Doug have seemingly thousands of miles under their collective belts already. They totally demolished me. But, still a great ride. About 32 miles, heading from my place straight out west on Hwy 6. There were an amazing number of other road bikers and motorcyclists out. Spring is here! I think I saw more motorcycles and bikes out in one ride than I saw all week in Hawaii last week. I guess if the weather is nice year around it's not quite as special to get out on two wheels. After the ride we relaxed outside on the sidewalk at Caribou with a hot cup of joe.

(photo thanks to Tex)

Now, a day later my quads still hurt. Spin classes and running occasionally during the winter helps, but it's just not the same thing as the 'real' road!

Tuesday, March 15, 2011

It looks like spring is finally coming! I brought my running gear in to work and was able to sneak out for a quick 2.9 mile run after lunch. It was a balmy 41 degrees, overcast, and starting to sprinkle- but it felt great to be outside.

I was hoping that I'd be able to bike into work tomorrow, but since I'm visiting our injection molding vendor that won't happen. I might get lucky and be back in the office early enough to allow me to swing home after the vendor visit and ride in for the afternoon.


View Larger Map

Wednesday, March 9, 2011

P-51BL Upgrade & Tricopter Update

Parkzone P-51BL structural upgrade
Over the life of my Parkzone P-51BL I've gone through two fuselages, and I'm now on my third. The previous two had failed multiple times just forward of the leading edge of the wing. I think they broke as a result of wildly overpowering the airframe, vibrational fatigue, and repeated impacts from hard landings. So, before I started flying fuselage #3 I thought I'd add some additional reinforcement. Next time it'll fail somewhere else... Part of the problem might be to fit the larger 2200 mAh batteries, I had to carve out a fair amount of foam.

I glued in several pieces of 1/8" liteply to the bottom and sides of the battery compartment. I also moved the velcro battery straps rearward and placed them under the plywood. So far, the modifications appear to work well. No breaks yet and the battery is securely held in place.


Tricopter Update
The wiring harness is almost done... I just finished the wiring harness to allow the main battery to first initialize the gyros via a UBEC, then once they are running the second switch will supply power to the ESC's for flight. Next step is to build a wiring harness to connect all of the gyro gain controls together. (the JST connector is for the UBEC)

Sunday, March 6, 2011

Multi-Camera Angle Video


This was my first try at a multi-camera angle film. You can see how motor vibration increased from the first to the last run. By the final runs- with the rear-ward facing camera- the vibration was bad enough to turn most of the field of view into "jello". I believe the issue is linked to the Hobby-King 10x5 APC clone prop. I'll be switching it out with a real APC and see if it rectifies the issue. I'm planning on using those HK 10x5 props for the Tri-copter, so I'm going to have to try and balance them to remove any vibration.

Also, during the final camera run the camera was ejected and fell several hundred feet down into the snow! This happened at the farthest distance away from me in the pattern I was flying. I saw a dark spot leave the aircraft, and initially I thought it was just my eyes playing tricks on me. When I brought the aircraft back, I noticed the camera was missing. It only took me an hour and a half searching on Saturday and another hour on Sunday to find the camera. ;) When it impacted the snow, it left a perfect rectangular hole, then penetrated down to the ice. Luckily I found it Sunday afternoon, because later in the day it started snowing. If I wouldn't have found it when I did, it would have been lost forever.

Tuesday, March 1, 2011

Tricopter Inches Closer to Completion...

After work tonight I was able to finish up the drive mechanism to tilt the "tail" rotor of the tricopter. I must say, the du-bro ball links are sweet. I re-used one from last summer's ill-fated "speedwing." The parts are all machined out of scrap delrin. The servo is taped to the bottom of the swiveling motor mount with some 3M VHB tape.


The entire motor / motor mount / servo assembly rotates about the aluminum spar. The black delrin piece at the end of the spar is fixed rigidly to the spar. So, when the servo actuates, the entire assembly rotates and the tail rotor will slew from side to side- hopefully providing a nice yaw rotation of the Tricopter.


Once this was working properly, I started mounting the gyros. This Tricopter will use 4 Hobbyking 401b gyros, one to control every axis of rotation. Everything I've read online says these gyros are very sensitive and negatively affected by vibration. I decided I'd mount the gyros on plywood daughter board, isolated from the main chassis through some rubber grommits. I'll also mount the gyros to the daughter board using double-stick tape. Hopefully both of these steps will help. If these steps are not enough I'll tear apart the gyros and tweak them as shown many places online.

Daughter board mounted


Gyros and Receiver Mounted


Lots 'o' wires

Next steps:
  • Build wiring harness for gyro gain control
  • Build wiring harness for initial gyro spin-up and ESC arm, then final flight power

Sunday, February 27, 2011

Tricopter Weekend Update

When Josh and John were out riding, I was soldering up a storm. All three motors and ESC's are now in place. It turns out that's a lot of soldering. (at least for me)


I believe I know how I'll wire the power connections to allow the gyro's to arm before the ESC's. I'll post a schematic if it works. I'm planning on connecting a UBEC to the battery connection on the receiver, and put a switch on the power leads for both the UBEC and another switch on the three ESCs in parallel. Hopefully it'll work to first switch on the UBEC, let the gyros arm, switch on the ESC's, then once the ESC's arm turn off the UBEC.

I also have not pulled apart the HK401b gyros yet. The online guide on the Hobbyking website recommends checking the internal solder joints and then reinforcing the circuit board with epoxy and double stick tape. I might just try and fly it without doing this first. There doesn't seem to be any rattles internally in the gyros. I might rig up a separate platform for the gyros to further insulate them from vibration- everything I've read so far indicates they cannot tolerate much. I'm thinking a small plywood daughterboard mounted on rubber grommets would work well.

I'm hoping to be able to complete the linkage between the tail rotor servo and pivot tomorrow.

With any luck it'll be flying this week....

Tuesday, February 22, 2011

Tricopter Start- At Last!

Literally months after ordering all the electronics, and perhaps a month after finishing machining the motor mounts, I've started on my first Tri-copter build in earnest. I'm basing my build after this knowledgeable Swedish fellow's build: http://www.rcexplorer.se/projects/tricopter/tricopter.html

I think this will make a fantastic camera platform- maybe even FPV someday. The motor struts are 1/2" OD aluminum tubes purchased from Lowe's. They appear to be a fairly soft alloy- it'll be interesting how well they stand up. They were quite cheap, though. $4 for a 36" length. My initial build is using 18" long struts.

The two body sections are 1/8" liteply cut to the plans on RCExplorer's website.  I'll probably cut lightening holes in the plywood body to save a few grams. RCExplorer uses fiberglass printed circuit board material for his components, but since I don't have easy access to that material I'm just using 1/8" plywood.

Eventually if this system flies well and proves fun, I'll upgrade the structural components to carbon shafts and a lighter weight body.

The motor mounts are my own design, machined from delrin scraps. The rotating tail motor mount uses the 1/2" aluminum tube as the bearing surface. It seems to work pretty well, with minimal slop.

Structural Components


I'm attaching the struts to the baseplate with 1.25" long 4-40 screws, also from Lowe's One nice feature of this design is the right and left struts will fold after removing a screw from each side. This will make the craft nice and compact for transport.

Unfolded, flight configuration (DX6i for reference)
The motors will mount at the end of each strut. The electronics will mount on the plywood, with the battery being suspended below the bottom plate. The rectangular "platform" towards the bottom of the photo is a prime place to mount a camera- that'll be the 'front' of the craft during flight. I have an old Canon SD300 that might get flown...

Folded, Storage configuration

Exciting stuff.... Perhaps it'll be flying in a week or two!