
After examining the dissembled litter box, I found a pretty simple machine:
- 12v DC Gear motor for driving the rake
- Limit switches for home and maximum travel
- IR LED / Phototransistor to detect the cat
I wanted this to be as inexpensive and easy as possible of a project, so I chose to re-use all of the stock sensors and motor.
Since an Arduino can't supply the required power or voltage to control the motor, a separate motor driver is needed. I chose to use a Seeedstudio motor drive shield as it was available at the local RadioShack store. This shield is also nice because it'll supply power to the Arduino it is attached to. One big negative, though, is that all of the I/Os are all proprietary "grove" connectors which RadioShack doesn't sell except in a $50 kit.
 |
| Seeed Studio Motor Shield |
I did a bunch of searching on the internet to try and find a local solution, or at least one that didn't require ordering parts from China. (Seeed Studios ships from China, not a domestic warehouse) Since I needed to finish this project relatively quickly, I couldn't wait for some parts to arrive from across the Pacific. Sparkfun does carry a cable / connector assembly that is really close. It fits after some modification with a X-acto knife.
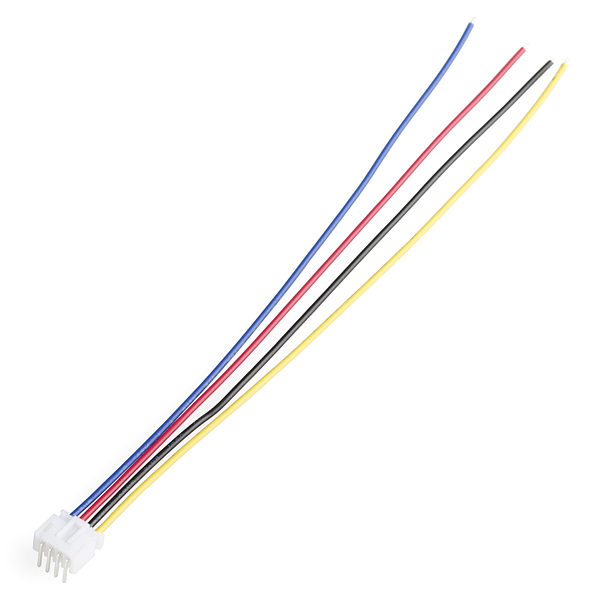 |
| Sparkfun JST Jumper 4-Wire Assembly |
The actual wiring of the project was pretty straightforward- basically hook everything up, make sure the appropriate pull-down resistors were in place, then start writing some code. I first wired everything using a standard breadboard, then once it worked I transitioned the parts to a permanently soldered perfboard.
 |
| Fritzing illustration of breadboarded setup |
I'm no codewarrior, so I wrote the arduino code as simple as possible, with lots of comments. There is also lots of feedback through the serial window to aid in debugging.
Use this project, details, etc at your own risk!
Arduino Code:
/*
Littermaid catbox control
uses Seeed studio motor shield
portions of code from Seeed example code
*/
// set up sensor & switch pin locations
int sensorPin = A0; // select the input pin for the cat presence sensor
int endPin = 3; // select the input pin for the endstop
int homePin = 4; // select the input pin for the home endstop
// set up motor pin locations, set by the motor shield used
int pinI1=8; //define I1 interface
int pinI2=11; //define I2 interface
int speedpinA=9; //enable motor A
int spead =255; //define the spead of motor
// set up various delays
int sensorloopdelay=500; //delay in ms between loop repetitions when waiting for cat
unsigned long delayaftercat=600000; //delay in ms before cycling catbox after cat is detected, 10 minutes
// set up default sensor values
int sensorValue = 100; // variable to store the value coming from the sensor. starting at 100 so no cat present
int endValue=1; // endstop status
int homeValue=1; // home stop status
unsigned long MaxTravelTime=30000; //maximum time for rake to travel each direction, assumes jammed if didn't finish in alloted time
void setup() {
// initialize the various inputs and outputs
pinMode(endPin, INPUT);
pinMode(homePin, INPUT);
pinMode(sensorPin, INPUT);
pinMode(pinI1, OUTPUT);
pinMode(pinI2, OUTPUT);
pinMode(speedpinA, OUTPUT);
//set up serial communications with computer
Serial.begin(9600);
}
void loop() {
// run catbox cycle
int success=0; // cycle success (1) or failure (0)
int i=0; // loop counter
Serial.println("cat box cycle start");
while (i < 5)
{ // run cycle maximum of 5 times, stop when cycle is successful
success = cycle();
Serial.println(success);
if (success != 0) // break out of 5 rep loop if cycle did not fail
{
Serial.println("successfull cycle");
i=5; // break out of loop
}
else
{
Serial.println("unsuccessful cycle");
i=i+1; //increment i
}
}
// reset sensor value
sensorValue = 100;
// wait until cat is detected
Serial.println("waiting for cat");
while (sensorValue > 10)
{
// read the value from the sensor
// if > 10 no cat
// if < 10 cat is present - loop until cat is present
sensorValue = analogRead(sensorPin);
Serial.println(sensorValue); //print sensor value for troubleshooting
delay(sensorloopdelay);
}
Serial.println("cat detected");
// wait until cat leaves
while (sensorValue < 10)
{
// read the value from the sensor
// if > 10 no cat
// if < 10 cat is present - loop until cat is present
sensorValue = analogRead(sensorPin);
Serial.println(sensorValue); //print sensor value for troubleshooting
delay(sensorloopdelay);
}
Serial.println("cat left, waiting for specified period of time");
// wait for specified period of time before running catbox cycle
delay(delayaftercat);
}
int cycle() //returns successful cycle or failure
{
unsigned long startMove_time=0;
unsigned long time_elapsed=0;
int success=0;
Serial.println("start motor out");
Serial.println("wait until endstop");
// wait until endstop is reached
startMove_time = millis(); // find time immediately before move start
backward(); // start motor towards endstop
Serial.println("moving towards endstop");
while (endValue != 0 & time_elapsed
{
time_elapsed= millis()-startMove_time; // calculate time elapsed
endValue=digitalRead(endPin);
}
stop_motor();
if (endValue==0)
{
Serial.println("endstop reached");
success=1;
}
if (time_elapsed >= MaxTravelTime)
{
Serial.println("outbound travel timed out");
success=0;
}
endValue=1; //reset endstop value
Serial.println("stop motor");
Serial.println("reverse motor");
Serial.println("wait until home stop");
startMove_time = millis(); // find time immediately before move start
time_elapsed=0; //reset time elapsed
forward(); // start motor back towards home
Serial.println("moving towards home");
while (homeValue != 0 & time_elapsed
{
time_elapsed= millis()-startMove_time; // calculate time elapsed
homeValue=digitalRead(homePin);
}
stop_motor(); // stop motor
if (homeValue==0)
{
Serial.println("home stop reached");
success=1;
}
if (time_elapsed >= MaxTravelTime)
{
Serial.println("inbound travel timed out");
success=0;
}
homeValue=1; //reset home stop value
Serial.println("stop motor");
return success; //return value back to main loop
}
void forward()
{
analogWrite(speedpinA,spead);//input a simulation value to set the speed
digitalWrite(pinI2,LOW);//turn DC Motor A move anticlockwise
digitalWrite(pinI1,HIGH);
}
void backward()//
{
analogWrite(speedpinA,spead);//input a simulation value to set the speed
digitalWrite(pinI2,HIGH);//turn DC Motor A move clockwise
digitalWrite(pinI1,LOW);
}
void stop_motor()//
{
digitalWrite(speedpinA,LOW);// Unenble the pin, to stop the motor. this should be done to avid damaging the motor.
delay(1000);
}
No comments:
Post a Comment