
I finally was able to do my initial calibration and 1st print last night:
All axis test
5mm Step Test Object
Before I finally was able to get the machine running, I spent a lot of time trying to track down some gremlins with the non-functional Z-axis. I was having all kinds of problems getting my Z-axis to work, then I tested the cables and discovered that the stepper motor cables had incorrectly attached connectors- no continuity on one of the leads. I cut off the connectors that came with the electronics kit and soldered some home-made connectors on (made from 0.100" space headers).
 |
| 0.100" Headers |
 |
| Finished Home-Made Stepper Motor Connector |
That helped a bit- but the Z axis still didn't want to move. I disconnected the lead screws to see if the gantry was jammed, and that wasn't it. Next, I removed the stepper driver board for the Z-axis and swapped it with the extra driver board the kit came with for a 2nd extruder. That was it- not only did the kit I purchased have 4 bad cables (2 stepper, 2 endstop), one of the 5 stepper drivers was bad. Anyway, all axis seem to work great now. Hopefully the electronics kit manufacturer will replace the faulty parts, but as they are our of Hong Kong I don't have much hope. FYI the Hong Kong source was www.gadgets3d.com, purchased through e-bay. Maybe cheap electronics directly from China isn't exactly "inexpensive" after all- just "cheap."
 |
| Faulty A4988 Stepper Driver |
I also swapped out my original larger diameter X and Y axis belt pulleys for some smaller diameter pulleys to increase available torque. The steppers are certainly fast enough so I don't need the larger diameter for belt speed.
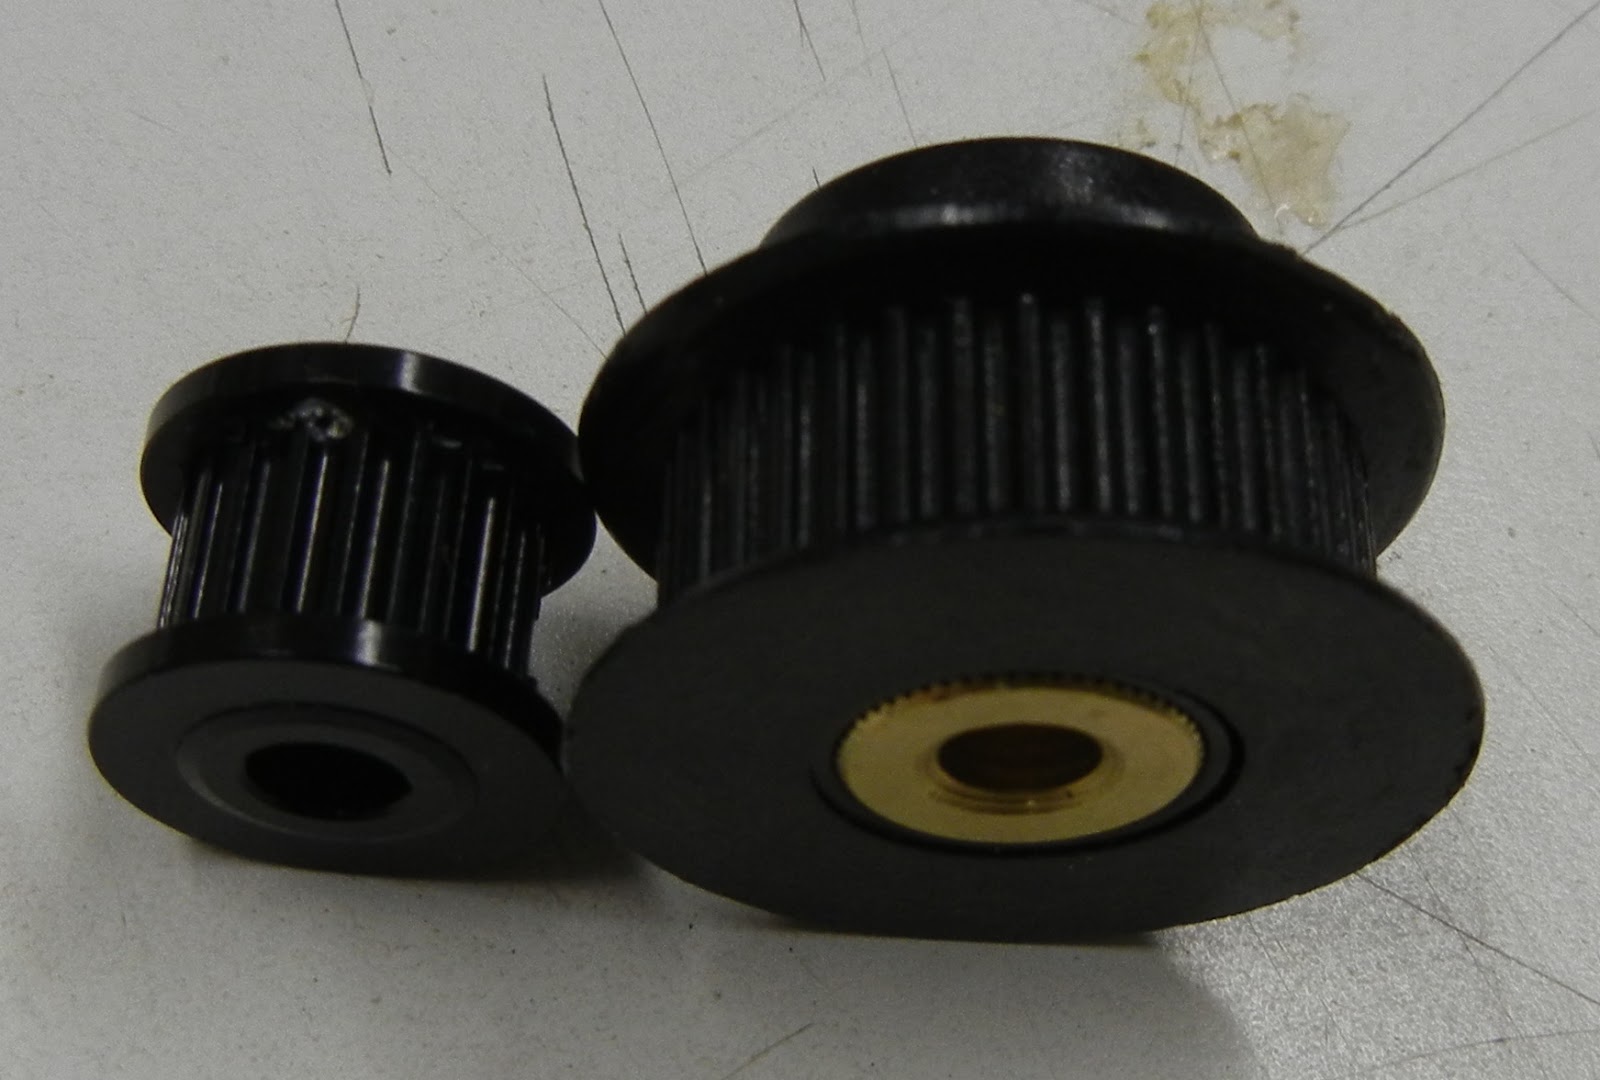 |
| GT2 Pulley Comparison |
 |
| Old, larger diameter GT2 pulley |
 |
| New, Smaller diameter GT2 Pulley |
Now, just to get the print quality dialed in. The build platform is only getting to 70 degrees C- it doesn't want to hit the 110C set point. I think the power supply doesn't have enough capacity to drive all the steppers, the nozzle, and the heated bed at the same time.
I recalibrated the extruder stepper- and that seemed to really improve part quality. The stock settings was pushing too much polymer through the extruder, causing the part to puff up like a marshmallow in a microwave.
I found an excellent calculator online to assist in calibrating your steppers- very easy to use and fast. mendelmax.com/RepRapCalculator.html.
I ended up with these settings for the Marlin firmware after several rounds of tweaking: (contained in the configuration.h file)
The highlighted numbers below correspond to steps per mm of travel, in the following order, X-axis, Y-axis, Z-axis, extruder
I have not tried playing around the with max feedrate or acceleration values yet.
// default settings
#define DEFAULT_AXIS_STEPS_PER_UNIT {79.9392,80.3409,1507.3528,680.6504}
#define DEFAULT_MAX_FEEDRATE {500, 500, 5, 20} // (mm/sec)
#define DEFAULT_MAX_ACCELERATION {900,900,80,10000} // X, Y, Z, E maximum start speed for accelerated moves. E default values are good for skeinforge 40+, for older versions raise them a lot.
I ended up designing yet another Z-axis endstop holder. My original was too flimsy and didn't work well. My new design is a lot sturdier. I might update the adjustment screw holder again just to stiffen the assembly up even more.
Now that the 3D printer is up and running, it's time to print.... more parts for the printer:
I recalibrated the extruder stepper- and that seemed to really improve part quality. The stock settings was pushing too much polymer through the extruder, causing the part to puff up like a marshmallow in a microwave.
I found an excellent calculator online to assist in calibrating your steppers- very easy to use and fast. mendelmax.com/RepRapCalculator.html.
I ended up with these settings for the Marlin firmware after several rounds of tweaking: (contained in the configuration.h file)
The highlighted numbers below correspond to steps per mm of travel, in the following order, X-axis, Y-axis, Z-axis, extruder
I have not tried playing around the with max feedrate or acceleration values yet.
// default settings
#define DEFAULT_AXIS_STEPS_PER_UNIT {79.9392,80.3409,1507.3528,680.6504}
#define DEFAULT_MAX_FEEDRATE {500, 500, 5, 20} // (mm/sec)
#define DEFAULT_MAX_ACCELERATION {900,900,80,10000} // X, Y, Z, E maximum start speed for accelerated moves. E default values are good for skeinforge 40+, for older versions raise them a lot.
 |
| MendelMax 1.5 RepRap ready for action |
 |
| Frog Model test print- off of Thingiverse |
 |
| Printing a Spool Holder off Thingiverse |
 |
| Added Cooling Fan to the RAMPS 1.4 Electronics- this actually seemed to help increase the print bed temperature! |
 |
| My own design Z-axis endstop holder, now available on Thingiverse for download |
I ended up designing yet another Z-axis endstop holder. My original was too flimsy and didn't work well. My new design is a lot sturdier. I might update the adjustment screw holder again just to stiffen the assembly up even more.
Now that the 3D printer is up and running, it's time to print.... more parts for the printer:
- ultipanel LCD controller mount
- cable chains for the X and Z axis
- fan mount to cool parts being printed
No comments:
Post a Comment