The
Turnigy Micro-Quad was a bit of an impulse buy- I saw pictures of it sitting in the palm of someone's hand and couldn't resist. Part of the cool factor is that the structure forms the power distribution board- it has a built-in PCB that you directly solder the ESC's and motors to. Hobbyking was perpetually out of the small brushless motor they recommended, so I chose a Hextronic motor that had similar specs. It turned out to work very well for this application.
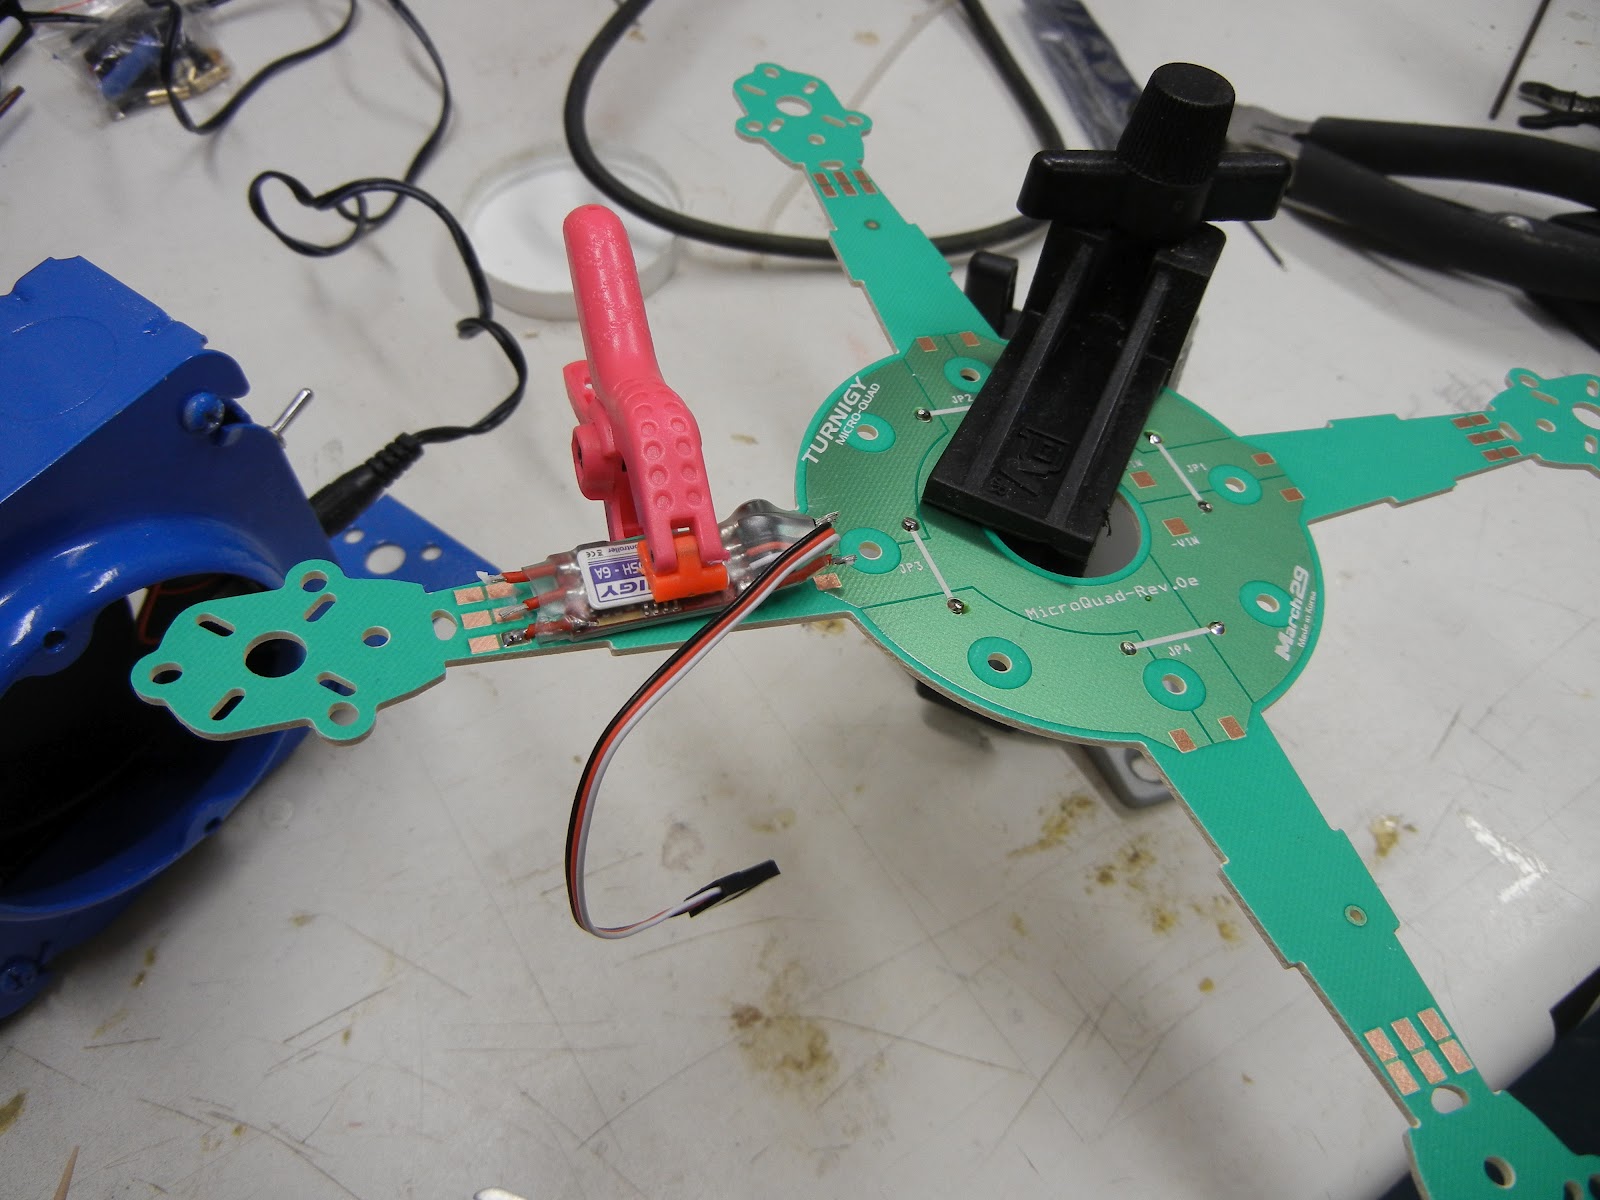
I cut the input and output leads down to about 1/8" longer than the heat shrink ESC package and stripped off as much of the insulation as I could. Before clamping the ESC to the quad's frame I dip coated each wire tip in flux.
 |
| Micro-Quad frame clamped in PanaVise for easy access. |
 |
| I used a heat-sink clamp to hold the wires in place during soldering. One down and two to go in this photo. |
Once the ESC's were soldered in place I installed the motors. I used 2-56 x 1/4" SHCSs. I used a drop of CA on each 2-56 nut along with some CA kicker to act as a thread locker to prevent the nuts from vibrating off during flight.
 |
| Testing motor rotation direction using alligator clips |
One slightly more tricky part of this build is that you had to get the motor rotation correct before soldering the motor leads in place, since there are not removable connectors between the motor and ESC. So, I soldered one lead in place, then used alligator clips to test a "guessed" motor hookup. I checked the motor rotation direction by hooking up the receiver and throttling up. If it was correct I soldered the leads in place. If not, just rotate the leads, test again, and solder when correct.
 |
| Soldering motor leads in place- note ball of flux on the motor lead wire tip |
Once all of the motors and ESCs were soldered into place, I glued together the structure with medium viscosity CA.


No comments:
Post a Comment