I thought it would be cool to fly a camera in the snowstorm yesterday. From my back door, the wind seemed light and manageable. Even from the lake surface at the bottom of the hill it seemd fine. Boy, was I wrong! As soon as I took off the P-51 was getting bounced around like crazy. It was all I could do to try and keep it under control let alone fly a nice pattern to try and capture video of the storm..

Sunday, February 20, 2011


Monday, February 14, 2011
Invisible Fence Troubleshooting
Our invisible fence for the dog went on the fritz a month or so ago. Specifically, somewhere on the property the wire broke and the loop indicator buzzer went off signalling a break. Until this past week, our dog didn't notice and it wasn't a problem. Sometime over the past week Sophie noticed the fence wasn't there anymore and started wandering the neighborhood- a big problem. Luckily the weather was great this weekend allowing me to try and fix the fence.
An invisible fence consists of a single strand of wire that is buried around the perimeter of your property. A box uses this wire to set up an electric field around the property at a certain radius from this wire. Your dog then wears a collar, and when the collar enters the field it first warns the dog with a audible tone, then if the dog continues it gives a nice jolt. Sophie was only shocked once- after that the audible tone was plenty. The fundimental problem with fixing these wire loops is that you don't know where the break is. In our case the fence encloses about a half acre and because of all the snow isn't really accessible.
There are some commercial products you can buy to do this, but the cheapest is over $50 and requires ordering online. There is another method using an RF choke placed across the output terminals of the box, but this method doesn't appear to work with the Petsafe Sportdog invisible fence setup we have.
My first step was to dig up the wire in four or five spots, and I tried to use a non-contact voltage probe to see if the wire at that point was energized or not. This didn't seem to work that well- it seemed to be very inconsistant and was potentially giving both false positives and false negatives. The probe indicated one section of fence was bad, and after cutting it out and laying new wire on top of the snow the fence circuit was still broken.
My next step was to purchase a continuity tester. I thought I could cut the wire in several locations, then use this device to detect if there was a break in each individual wire segment.
Unfortunately after I got home I realized that you needed two wires for this device to work. I wasn't about to lay out a huge wire segment just to let this tool work. So back to Lowes' went the tool.
So, finally I decided to make my own continuity tester. I thought I could use the fence wire and the ground to complete the circuit. I thought since a battery's negative pole is the electron source, and the electrons flow back to the positive pole, I'd design the circuit using a positive ground. Afterwards I did some internet searching and it looks like a negative ground might be a better design. However, it worked.
I used a two AA battery holder to generate 3V, then attached an allegator clip to the negative lead and a long nail to the positive lead. I then pressed the nail into the ground (after first thawing it with a heat gun) and attached the negative lead to one end of a fence segment.
For the continuity indicator, I soldered a 100k ohm resistor to the LED cathode to limit current. The aligator clip attached to the resistor. I then attached the grounding nail to the anode. When I pressed the nail into the ground and attached the aligator clip to the fence wire the LED lit if the fence wire was unbroken. This method seemed to work. After some trial-and-error due to poor grounds in some locations I was able to locate the break and string new wire on top of the snow.
 |
| Invisible Fence Continuity Tester Schematic |
The home made tester worked OK- but the LED was rather weak when used for the longer wire runs. (probably 150 feet or so). Perhaps it'd be better if I switched the positive ground for a negative ground. I think another option to try would be a slightly more complex circuit using a transistor switched LED, where the fence lead would only deliver a "high" or "low" signal, and the transistor would be powered directly from an attached battery.
Saturday, February 12, 2011
Moonie Lake Flying Club Video
Great flying today at the lake. Too bad John was busy. This might have been the last good weekend of the year. Saturday it was 38+ degrees and sunny- about the most pleasant weather you could imagine for flying on the lake. I didn't even have to wear gloves and was perfectly comfortable. I'm guessing all the melting this week will turn the lake into a giant puddle of slush.
Sunday, January 23, 2011
Ode to Harbor Freight Floor Nailer
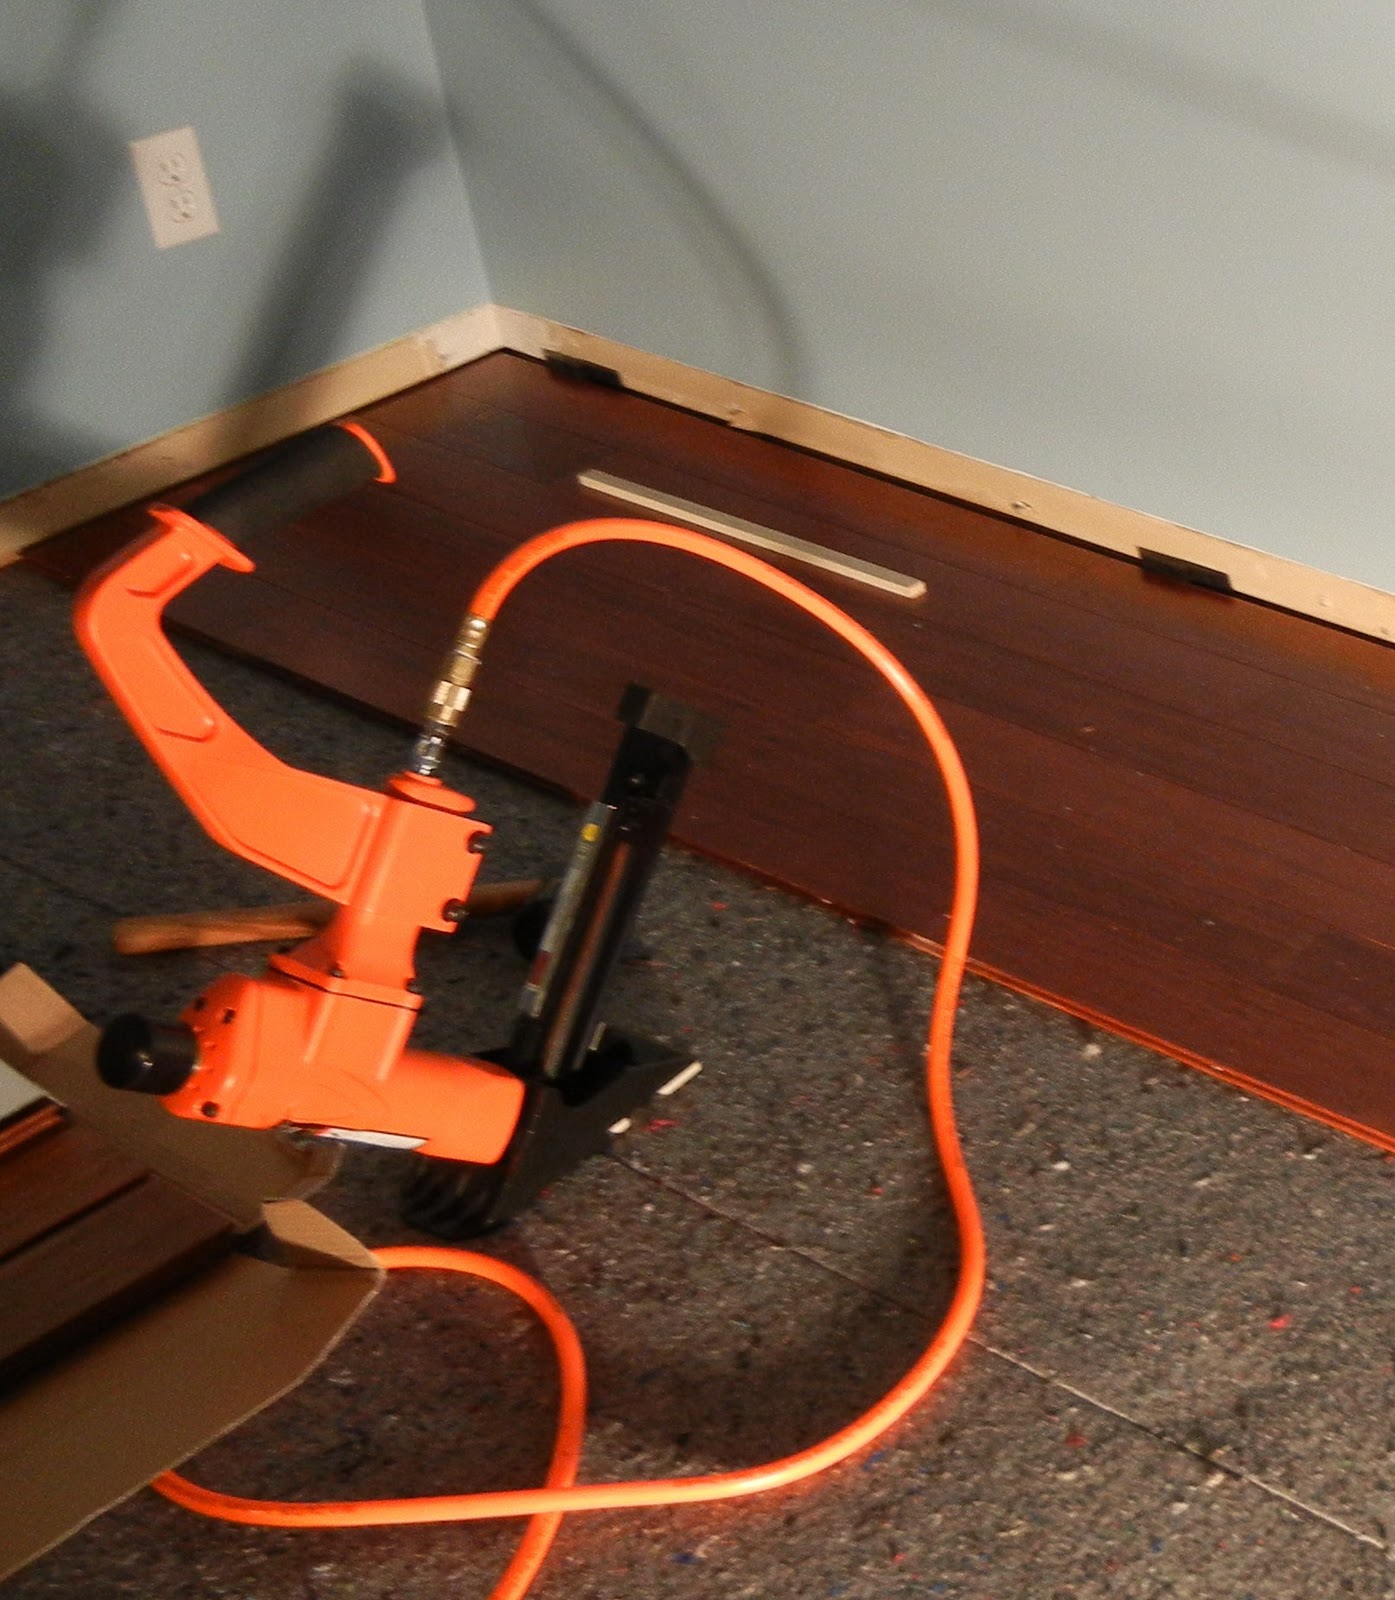
This floor nailer has to be one of the best bargains from Harbor Freight. Just over a $100 after sale and coupon. Works great, and paid itself back after not renting a nailer for two days.
Tips for nailing the Lumber Liquidators Morning Star qing xiamen 5/8" x 3.75" strand bamboo floor:
- 95 PSI
- Let the hammer do the work- too little of a swing and it'll be an incomplete nail drive & bulge the wood surface, too much and the tongue will crack.
- Make sure the guides on the bottom of the nailer are as precisely aligned with the tongue as possible.
Snowblower Fix
It's been quite a while since my last post. Not that I've been doing nothing, but mostly that I haven't had the drive to document anything online. Well, I've got the bug again, so here goes...
What follows is a quick documentation of my repairs to our Yard Machines / MTD snowblower model number 31AE160-129. There were a few inconsistancies with other online fix-it references so hopefully this is helpful for someone.
Our used Yard Machines snowblower started having some issues during the first major snowdump back in mid-December. It turns out the weld which connected the bar holding the rubber auger to the main drive shaft failed on one side. You can order a new auger assembly but it's quite expensive- close to $150 shipped. In the photo you can see how that after the weld failed, the rotating shaft actually ground out a larger hole in the steel bar.
I decided to find a local repair shop to re-weld the part. After trying to find a welder using google maps, I realized the gas station down the street would have welding equipment. I called them, and sure enough Herb's Service Center was game.
The only problem was I'd have to remove the assembly to bring it in. Only a few screws need to be removed to pull the cover off to expose the drive belt. Next up is the removal of the drive pulley. This proved to be an interesting problem. First, I wedged a piece of scrap wood in the auger. This prevented it from rotating when I removed the pulley. I broke out the breaker bar and socket to unscrew the pulley. From the online illustrations and descriptions I could find it appeared as though the pulley simply screwed onto the threaded auger shaft. The "expert" mechanics on varous forums also said the pulley was threaded using standard thread direction- e.g. counter clock wise to remove. I torqued on that thing as hard as I could and nothing budged, except for some warning bending and creaking noises coming from the snowblower frame.
Key Learning Moment:
After a few minutes of leaning on the breaker bar, I decided to sit back and think about it. After looking at how the auger works, it's obvious that a reasonable engineer would spec the pulley with reverse threads, so it self-tightens when encountering a load rather than self-loosens. I put the breaker back back on, tried turning to clockwise and seconds later the pulley popped loose.
The guys at Herbs did a decent job with the weld. Not too great looking cosmetically, but there is now plenty of metal to transmit torque to the rubber auger. They also spray painted it a nice shade of blue.


The snowblower went together easily, but seconds after putting it back to service the V-belt failed. Another lesson. Never use the cheap rubber V-belts they sell at every hardware store. Make sure and get the heavy-duty fiber reinforced belts specifically for snowblowers. The proper belt is a 1/2" x 35" large, MTD p/n 754-0101a. The replacement I found wasn't an MTB brand, but a Mitshubishi. It seems to work fine so far.
What follows is a quick documentation of my repairs to our Yard Machines / MTD snowblower model number 31AE160-129. There were a few inconsistancies with other online fix-it references so hopefully this is helpful for someone.
Our used Yard Machines snowblower started having some issues during the first major snowdump back in mid-December. It turns out the weld which connected the bar holding the rubber auger to the main drive shaft failed on one side. You can order a new auger assembly but it's quite expensive- close to $150 shipped. In the photo you can see how that after the weld failed, the rotating shaft actually ground out a larger hole in the steel bar.
 |
| Broken Weld, Still in Snowblower |
I decided to find a local repair shop to re-weld the part. After trying to find a welder using google maps, I realized the gas station down the street would have welding equipment. I called them, and sure enough Herb's Service Center was game.
The only problem was I'd have to remove the assembly to bring it in. Only a few screws need to be removed to pull the cover off to expose the drive belt. Next up is the removal of the drive pulley. This proved to be an interesting problem. First, I wedged a piece of scrap wood in the auger. This prevented it from rotating when I removed the pulley. I broke out the breaker bar and socket to unscrew the pulley. From the online illustrations and descriptions I could find it appeared as though the pulley simply screwed onto the threaded auger shaft. The "expert" mechanics on varous forums also said the pulley was threaded using standard thread direction- e.g. counter clock wise to remove. I torqued on that thing as hard as I could and nothing budged, except for some warning bending and creaking noises coming from the snowblower frame.
Key Learning Moment:
After a few minutes of leaning on the breaker bar, I decided to sit back and think about it. After looking at how the auger works, it's obvious that a reasonable engineer would spec the pulley with reverse threads, so it self-tightens when encountering a load rather than self-loosens. I put the breaker back back on, tried turning to clockwise and seconds later the pulley popped loose.
 | |
| Sweet 2x4 "fixture" |
 | |
| Broken Weld after Removal |
The guys at Herbs did a decent job with the weld. Not too great looking cosmetically, but there is now plenty of metal to transmit torque to the rubber auger. They also spray painted it a nice shade of blue.


The snowblower went together easily, but seconds after putting it back to service the V-belt failed. Another lesson. Never use the cheap rubber V-belts they sell at every hardware store. Make sure and get the heavy-duty fiber reinforced belts specifically for snowblowers. The proper belt is a 1/2" x 35" large, MTD p/n 754-0101a. The replacement I found wasn't an MTB brand, but a Mitshubishi. It seems to work fine so far.
Wednesday, December 22, 2010
Nice Home-Brew Daylight Alarm Clock
http://processors.wiki.ti.com/index.php/Msp430lamp
In particular, the LED clock segments shine through a wood veneer, so when the display is off it looks like the base is solid wood.
In particular, the LED clock segments shine through a wood veneer, so when the display is off it looks like the base is solid wood.
Monday, November 1, 2010
Floating Shelf / Hidden Drawer Complete
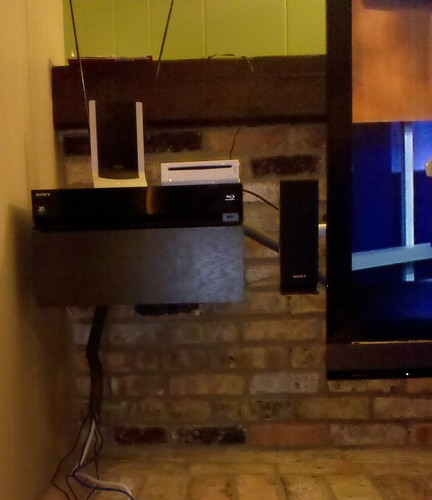
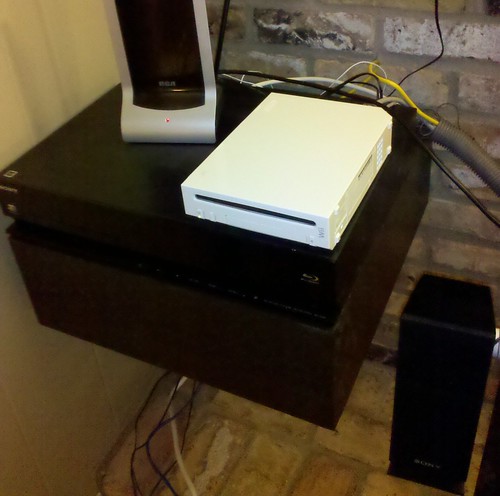
The home theater floating shelf is done. I think it turned out pretty well. I need to do some serious cable organization to clean it up, though. I'd also like to find a better home for the HDTV antenna, or perhaps find a more compact antenna to hide behind the TV.

Subscribe to:
Posts (Atom)