Sunday, March 9, 2014

Makerbot Replicator 2x leaky nozzle fix

The used Makerbot Replicator 2x we purchased for the office has oozed / leaked plastic from the joint between the right extruder nozzle and the heater block from day one. The material would ooze out and form a plastic stalactite during a print, and occasionally break off and ruin a print.

Small immature green plastic stalactite visible on the right nozzle, on its upper left side. 
I decided to try and fix this by taking apart the extruder and using PTFE plumber's tape on all of the threads.

Makerbot doesn't really intended for end users to change / remove the nozzles, so it takes a fair amount of careful disassembly to do this.  It's also easy to break the ceramic insulators around the hot end heaters, thermocouple wires, etc, so do this at your own financial risk!

First, remove both extruder stepper motors, drive systems, and fans until you have the bare X axis platform and hot ends as shown below. This is a good time to loosen the set screws holding the hot ends in place. These are on the back side of the aluminum block, not quite visible on the "top" side of the photo below. Once these set screws are loose enough the hot ends will drop free- so be careful, the thermocouple / thermistor wires are very fine and easily broken. These set screws are also how you adjust the nozzle height to level the two nozzles.

Steppers, fans, and drive blocks removed
Next, remove the hot end block from the X-axis platform. There are two hex head screws to remove, one on each side of the X-axis platform. 

Bottom of X-axis platform, one screw visible
Once the two screws are removed, the hot end block can be carefully lifted free. This isn't totally necessary but makes disassembling the hot ends easier.

Hot end block lifted free

Setscrew for right hot end fully loosened, starting to pull hot end out (carefully)

Hot End is free. Thermocouple / Thermistor lead visible on the right

I first attempted to remove the nozzle and steel barrel from the hot end block by using a small wrench and a socket, but no luck. They were solid, plus I had trouble putting enough force into the wrenches while trying not a break anything.

Trying a 3/16" wrench
 So, my next step was to remove both the cartridge heater and the thermocouple / thermistor, then I could totally remove the hot end components from the printer.

Heater element removed
After the cartridge heater and thermistor are removed, you can carefully pull off the fiberglass insulation.

Thermocouple / thermistor & insulation removed

Hot End is free! the set screw on the left holds the cartridge heater in place
 I thought that there must be some solidified and baked plastic gluing the nozzle and barrel in place. I thought some careful application of heat from a heat gun would soften the plastic enough to take everything apart. Don't use a blowtorch as you can easily overheat the brass nozzle and deform it.

Heating assembly (heat gun barely visible on the top of photo)
Once everything is hot, very carefully twist the barrel and nozzle off. I didn't take a photo of it, but I held the heater block in place using the an appropriately sized drillbit held in a vice. The ceramic insulation over the aluminum heater block is very easy to crack, so be careful.

Carefully unscrewing parts after heating

Cleaning off the nozzle

Green ooze!
 Once all parts were removed from the heater block, I wrapped a couple layers of PTFE plumber's tape over the male threads. I make sure the tape wasn't blocking the through hole. Once the tape was applied to both steel barrel and nozzle I re-assembled the hot end.

White PTFE tape visible on the bottom side of the steel barrel
 I managed to slightly crack the ceramic jacket on the hot end during dissassembly. I cut some strips from my kapton tape roll that I normally use to cover the heated print bed to patch it back together.

Nozzle back in place. Note the extra kaptontape I used to patch together the cracked ceramic. 

Fiberglass insulation re-applied


Ready for re-assembly
Re-assemble the unit. Note that when you tighten the set screws in the aluminum block that hold the hot-ends in place, you'll have to carefully set the nozzle height- both nozzles should be as close to the same height above the print bed as possible.

The repair worked- after putting everything back together and re-leveling the build platform, all new prints were completed without the annoying plastic stalactites forming.

Sunday, March 2, 2014

Wolf Tooth Components Giant Cog GC42 Installation and first thoughts

I ditched my 9:zero:7's front deraileur by using a Wolf Tooth components 30T front cog several months ago. This gave me a lowest possible gear of 30T front, 34T rear- fine most of the time, but for really deep snow or steep climbs I wanted an even lower gear. Since I was originally running 9 speed SRAM components, a 34T rear cog was as big as I could go. When I saw Wolf Tooth was coming out with a 42T rear cog, I got excited- it seemed to be a cost-effective way to simulate SRAM XO1 or X11 without the giant price tag. Essentially it works by adding a new larger 42T cog at the large end of the cassette, and omitting the 17T cog from the cassette's midrange.

There are other companies (OneUp components being another) making 42T cassette cogs, but Wolf Tooth is a Minneapolis company and besides that, seems to make great quality product. The GC42 seems to be in short supply right now- there must be a pent-up demand for a product like this.

GC42!
To use the new GC42 I had to convert to 10-speed, though. I went with a SRAM X9 mix for economics- X0 or Shimano XT would have been great options but more money. I'm also excited to move to a Type 2 rear deraileur- no more chainslap- hopefully a totally quiet ride even on rough terrain now.

Exact Components Used:

Extra Components that I found I needed during install:
  • extra SRAM 10-speed chain master link
  • scrap section of 10-speed chain from other bike to donate a few links
Wolf Tooth has a good set of  instructions posted on their website. Of course, I didn't bother reading them until after I finished the install! Note this isn't quite a toss it on and ride kind of upgrade, there was a lot of playing around with the B-screw tension and chain length to get it up and running. Even after 30 minutes or so of adjustments, the upshift from the 36T to the 42T isn't quite perfect. I'm guessing after the first ride it'll improve- I think the 42GC needs to rotate slightly on the freehub body splines to get the upshift ramps and sharktooth cog gears in perfect alignment. 


Before surgery - SRAM X7 9-speed, 34-11 rear cassette

Installation
Bolting everything on was simple, no different than installing any other deraileur / shifter / cog upgrade. Removing the 17T tooth cog was likewise simple- just make sure to pull out the correct cog and spacer, and get the rest of the cassette stack on the freehub body in the proper orientation. 

I like the "MADE IN USA" label! Not too often you see that on bike parts these days

42T Cog installed on the 9:zero:7 rear hub.
17T cog and spacer removed from the Cassette stack


Everything slid into place and locked
Ready for tuning


 I originally tried to use just the full brand new PC1031 chain (114 links) but it wasn't long enough- very scary trying to upshift into the 42T on the stand, total lock-up. I tried maxing out the stock SRAM B-screw tension, then added the Wolf Tooth longer B screw- still not enough to get the derailleur to shift into the 42T. (note the Wolf Tooth longer B screw wasn't actually necessary)


Next step, longer chain. I had some 10-speed Dura-Ace links in my toolbox- I added about 10 links along with an extra SRAM master link to tie it all together. That was much too long- the derailleur didn't have enough capacity to tension the chain while in the smallest cog. So, I started to remove links and re-assemble until I had a chain length that would shift into the 42T while still having some tension left while in the 11T cog. See the picture below for how much chain was needed- depending upon how you count chain links, about 4 pin to pin distances added including the new Master Link. 

 Uncut SRAM PC1031 114 link chain + extra master link and several spare links

Absolute longest chain the X9 medium cage can handle
Once I had the chain length right, I could adjust the B-screw tension so the derailleur would shift into the 42T cog, as well as not rub while in the 42T. The trade-off in increasing the B screw tension is that the derailleur wraps tighter while in the 11T cog, causing the chain to rub together. (see photo below)

Slight contact between chain in 11T cog 
Tight fit, even with longer chain. X9 medium cage is maxed out

Not quite right alignment when upshifting to the 42T- perhaps the 42T isn't seated on cassette
Closing Thoughts
I thought the cog would install and tune easier than it did. I've never had to fine tune chain length, B-screw tension, and shift cable tension like this to get a system to work right. It still doesn't shift quite as nicely as I'd like into the 42T. From what Wolf Tooth says, though, it might change during the first ride when you put some torque into the pedals to shift the cogs into place. That might slightly improve the ramp / shift tooth alignment helping the shift. If that doesn't totally fix the hesitation going into the 42T I might take a file and remove a very small amount of material from the "shark tooth" teeth on the 42T that assist with shifting into the big cog. You can see in the photo above that the chain is slightly jamming against that "shark tooth" on the 42T cog and impeding the shift, so removing a tiny bit of material on that tooth face might help.

The verdict won't be in until the first ride though. I'm adding a lot of low end grunt with this upgrade- going from a 34T to a 42T is a big change! And, if it does work well (even marginally well going into the 42T) it should be a worthwhile upgrade- and much, much less expensive than upgrading to a SRAM X01 or X11 groupo.

Thursday, February 20, 2014

RAMPS FD initial setup

I decided to go for the gold and try using the RAMPS FD along with a Arduino Due on my "Snowstock" Delta bot build.

Unfortunately after reading through the reprap.org forum on the FD, it seems like I may have bought the board much too early from Geeetech- the board I received is the v1 rev A, and the guys developing it haven't even finished the development process yet.... So lots of know issues with this board. I guess I'll just have to jump in and see if I can get it running, and if it's too much trouble switch back to a traditional RAMPS 1.4 setup.

The 'official' documentation and other blog postings on this board is a bit thin, so I'm crossing my fingers that I'm able to get it up and running successfully.

I did find the board schematic: http://www.geeetech.com/wiki/index.php/File:RAMPS-FD-Schematic.pdf

along with a wiki page on Geeetech's website: http://www.geeetech.com/wiki/index.php/Ramps-FD

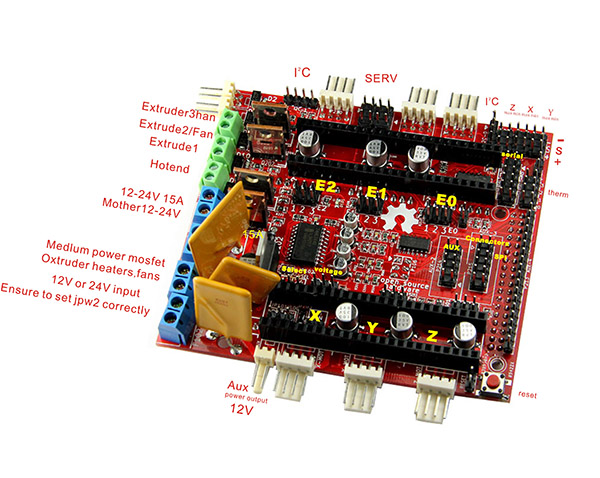
Geeetech does have a rather uniformative labeled picture:


this forum has some information as well: http://forums.reprap.org/read.php?13,244284

My first action was to try and determine the polarity of the power inputs- I really don't want to fry the board because I had my power supply hooked up backwards. When I was looking through the schematic I noticed a critical jumper that needed to be changed- JP102 specifies the board input voltage. 1-2 specifies 24v, and 2-3 specifies 12v. On my board it seemed to be incorrectly labeled- it reads as 1-2 2-4. I guessed the 2-4 pin spot was correct for my 12v power supply.

Next up was the actual polarity of the power inputs- helpfully all of the printed pin numbers are completely covered by the wire sockets on my board. The schematic seems to indicate P107 (motors only), P108 (extruder heater, fans), P101 (heated bed) all have a common scheme- #1 pin ground and #2 pin power/hot, but these pin numbers are not visible on the board.

This photo of a prototype RAMPS-FD board (from Reprap.org forum)  seems to show the ground wires on the "bottom" of the board and the "power" wires "higher" on the board:

http://farm4.staticflickr.com/3708/9720665422_00f63658d4.jpg
I'll post again when I give it a go.... Hopefully no smoke for the first time it gets plugged in!


Thursday, February 6, 2014

Makerbot Replicator 2x initial impressions, extruder upgrade, and dissolvable filament

I recently moved to a new job, and immediately bought a 3D printer for the lab. I found a good deal on a used Makerbot Replicator 2x- saved about a grand off the price of a new one.

Up until I fired it up, I have had a lot of experience with the Afina printer, my home built Mendelmax, and am in the process of designing / building a Rostock / Wolfstock delta bot clone- but no experience with Makerbot products.

Initial impressions were decent- it seemed to be a step up from the Afina- slightly more solid construction, and the software was more polished. Print quality seems to be very good, especially at the 0.1mm layer height.

But....

  • Printing on glass would require some modifications- using PET / kapton / polyimide sheet is a pain to use and is expensive. Since the platform isn't removable, and doesn't easily accommodate a removable glass sheet, Kapton tape is applied directly to the platform, and parts have to be removed from the platform. If parts are stuck, you are forced to use a putty knife and a few sharp taps from a hammer to break the part loose. Am I the only person who is disturbed by literally hammering on a delicate $2k+ machine? 
  • The platform isn't perfectly flat- it bows upward in the center slightly. This hasn't appreciably affected part quality, but I'm sure it at least slightly affects it. 
  • The stock filament drive system isn't very reliable, and easily jams / stalls. This is easily rectified by downloading and printing an upgrade from Thingiverse and adding the appropriate hardware. Which, strangely enough, Makerbot sells on their website. (but doesn't fix the root problem- their filament feeder design)
The extruder / filament feed upgrade is a must do in my book. When I first set up the printer I was having constant feeding issues- probably 50% of the time the print would fail because the extruder would mysteriously stop feeding filament. I took apart the print head, adjusted the spring tension, etc, but to no avail. I ended up installing this upgraded filament extruder design: http://www.thingiverse.com/thing:94979 
I purchased two copies of the Makerbot hardware kit from Makerbot.com. It was quick and easy to install, and immediately solved the filament feed issue. It has been 100% reliable ever since I installed it, on every filament I've tried. 

Stock Makerbot R extruder mechanism (removed from drive motor)
After taking apart the stock extruder, it was easy to see why it had problems. Very small spring, limited travel- even with the tension screw cranked down all the way it didn't have enough travel to accommodate any changes in filament diameter / roundness / compression.

New Makerbot R extruder mechanism (on drive motor)
 The replacement drive mechanisms have a large spring, and the idler wheel has lots of travel to accommodate any conceivable variation in filament thickness.

Stock Makerbot L extruder, on drive motor

Replacement L drive mechanism

Stock extruder, back side. Loading / de-tensioning lever at the top, idler wheel at the lower left

De-tensioning lever removed- tension spring visible- tiny!

Both L and R new extruder feed mechanisms installed and ready to go!

Warmed up and ready to print
Bottom line, the Makerbot Replicator 2x is a nice unit and produces good quality prints- after some modification. Personally I'm glad I built my own, but I have the patience to tweak my home-built machine and really tune it for good performance. There is still some of that with the 2x, but it's much, much closer to a plug-and-play John-Q-public consumer friendly appliance.

One big benefit of the Makerbot Replicator 2x is that it has two extruder heads- allowing you to print two materials on the same part. You could use two colors, or, print a dissolvable support structure, allowing for more complex parts. I'm trying to print complex 3D models of the vascular system, so being able to dissolve a printable support structure is very useful. 

Makerbot sells their "dissolvable" filament for this purpose- which is actually HIPS - high impact polystyrene. They recommend a chemical called d-limonene to dissolve it. Unfortunately this isn't something you are going to find at Home Depot in the concentration necessary to actually dissolve HIPS. 

I ordered this gallon of d-limonene off of amazon.com:

Gallon of orange-scented nastiness
Just because it smells like oranges doesn't mean it's good for you. This stuff actually started dissolving a plastic putty knife I was using to clean up a part. So make sure to wear gloves, protective facegear, and work in a well ventilated area when using it. It also seems like using glass, HDPE, PP, wood, or other chemical resistant containers and tools is required. 

Using a sterilite plastic container to soak the parts

Starting to scoop out the HIPS support

Yummy!
30 minutes of soaking really softened up the HIPS, allowing easy scooping of the material. It seems like removing as much material as possible and letting the d-limonene only dissolve the bare minimum of plastic is a good idea. The D-limonene isn't cheap, and conserving it makes sense. A soak of 2+ hours seems required to really clean off all remaining HIPS off of the ABS part.

Bottom line, using a dissolvable support structure is smelly, messy, and seems worth it only if the parts you are printing have very complex geometry and would be difficult to clean up using an ABS support structure.


Tuesday, January 28, 2014

Delta Bot #4: Heated Build Platform + Initial Electronics

Next up on the delta robot 3D printer- cutting out the plywood for the build platform, and initial electronics installation.

I picked up a 2'x4' 1/2" plywood handipanel from home depot for the build platform. I decided to cut out a 14" circular platform. I used a scrap piece of wood with two holes drilled in it to trace out a circle- pinning the center with a drill bit.

Tracing the outline
Circular plywood platform cut out- trial fitting
I used 4-40 blind nuts set into the bottom of the platform to fasten the heated bed in place

4-40 Blind nut pulled into place
Under the heated bed I placed two layers of cork tile- totaling about 3/8" in height. The cork will insulate the bottom of the heated bed and hopefully help it heat up faster and maintain a constant temp during print jobs. The heated bed is held in place with 4x 1" 4-40" SHCS, with a printed spacer and a 4-40 washer between the bottom of the bed and the top of the plywood platform.

Everything bolted into place
Next step was to wire the endstop switches. I had a big spool of CAT 5e cable in the garage- perfect. It has enough individual wire strands for all three endstops and another two left over.

Endstop with wire soldered and heat shrink in place

I drew up and printed some wire clips that snap into the Makerslide aluminum extrusion. I'll upload the models to Thingiverse as soon as the site is back up. 
Makerslide wire clip

UPS brought some goodies this week- a RAMPS FD printer driver board. I'm hoping to plug it into a UDOO dual core board, and use the assembly as an all-in-one printer controller & driver. 
GETECH RAMPS FD box

RAMPS FD out of the anti-static bag. I'm digging the side connectors for the stepper motors. 

Dual core UDOO

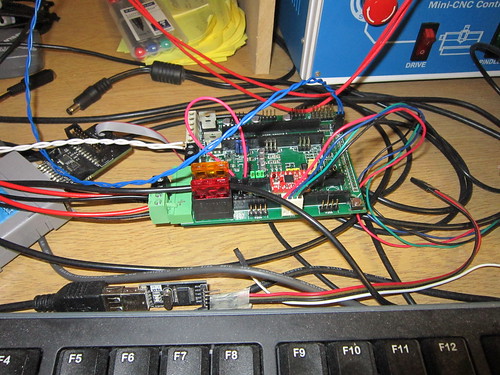
All plugged together and ready to roll
Next up, actually getting something to move...