Since Anna's been going to bed early every night because she is working hard growing a baby, I've had time to work on a number of different projects. I think people avoid balsa kits because of the time required for assembly- especially compared to quality balsa or foam ARF models - but I think there is a lot of satisfaction in actually building something. I also seem to have more time available at night at home vs. time available to actually go flying. For a beginner, though, nothing beats a foam ARF which you can repair in ten minutes with hot glue and packing tape. Balsa is a lot less forgiving.
Nanoplanes.net Balsa Baby Shark

This is a first class product. (and I haven't even flown it yet) Top quality instructions, clever design and easy construction. In particular I really liked how they have you laminate different pieces of wood together with alternating grain direction for maximum strength. This should be an absolute rocket, I'm hoping for 100+ mph top speeds. I won't maiden this until I can have John help me trim it out at a large field.
In static testing the motor pulled 26.5 amps with a APC 4.75 x 4.75 prop.
Components Used:
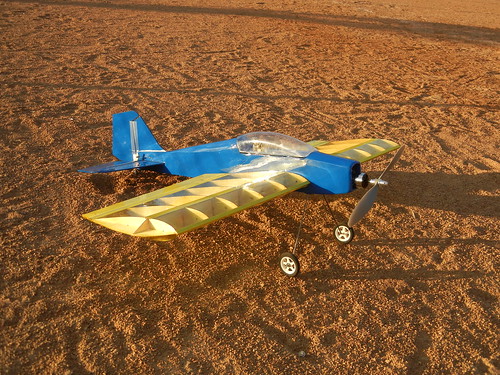
Mountain Models Mini-Flash

This was a fun build. All precision laser-cut balsa, the kit included a very complete hardware package.
It went together fairly quickly. The directions were not quite as good as the Baby Shark, and it would have been helpful to have alternative motor mounts available. The plane was designed for a GWS gear drive system with a stick-mount. I used a brushless motor, plus a home-made delrin adapter plate to allow the use of an E-flite brushless stick mount. Mountain Models should also consider updating their instructions to match kit contents better- the instructions state Doculam covering is included with the kit, but it wasn't in mine. Note I didn't mind, as I didn't intend to use that material anyway.
I also had some trouble getting the CG to line up right- perhaps I used too heavy of a covering or excessive glue in the tail. I'd also recommend NOT using CA to fasten the canopy in place- the CA fumes deposited white residue on the inside of the canopy and on my pilot.
However, the end result looks good and flies great. Extremely acrobatic, and I'm still using the recommended low rates. High rates are insane, I'll have to get in some serious practice before I'll be able to fly using them. I also really like how the transparent yellow wings look when in flight.
Components Used:
- Spektrum AR6110 receiver
- 2213n 800 kV motor- I originally intended on using this 1200kv motor (previously well used on other aircraft), but accidentally broke several wires when installing the motor. I had this 800 kV motor as a backup for my Tricopter motors, but thought I'd put it to good use here.
- APC 10x4.7 SF prop. This only gives about 10amps- I will try larger diameter and higher pitch to try and bring this closer to 18amps at full throttle. I'm thinking an 11x7 SF might be a good choice. Even with the 10x4.7 prop the aircraft has nearly vertical performance, and nice long flight times.
- Turnigy Plush 18A ESC
- 4x HXT900 servos
- Rhino 750 mAh, 3s, 20c lipo batteries
- Coverite transparent yellow iron-on covering
- Blue econocote iron-on covering
E-Flite Funtana 300
I purchased this acrobatic foamie from Mark last year. It had an unfortunate crash this past winter- nose-first into the ice. I patched it back together with balsa, but it really hasn't flown the same since because of the added weight from all the balsa and epoxy patches. When I built the Mountain Models mini-Flash, I removed the Funtana's Spektrum AR6110 for the new plane. I did purchase a few of
Hobbyking's new RA61E 6 channel 6110 knock-off receivers. I was a little skeptical about their quality so I certainly won't put one in a balsa model, but it was a perfect receiver to put in the Funtana which is now somewhat disposable. I flew it for a couple batteries last night, and the cheapo receiver seems to bind and function just like the AR6110 origional, but only 25% of the cost.


