Sunday, February 15, 2015

Magicshine mount for Giro Edit

I just purchased a new helmet for winter riding- I was tired of getting a brain freeze from riding in 10 degree temps with my regular helmet and Gore balaclava underneath. Way back in the day I would have just duct-taped the helmet vents, but these days there are lots of great winter helmet options. The helmet is great by itself- and it has a nice bonus feature- a built-in GoPro mount. One of the nice things about this new helmet and printed mount is that no additional purchased hardware is needed to attach the light.

I designed a mount for the gopro adhesive mount I attached to my summer helmet, but the angles were not right for the new helmet. So, off to Solidworks to design a new mount. The first try seemed to work well. I might add a feature to clip on the wire, but other than that it's good to go. I might also try moving the light further back towards the helmet.

I placed the Solidworks .prt and .stl files on thingiverse if you want to print your own.

GoPro adapter printed

MagicShine bolted on

Magicshine LED mounted to the Giro EDIT


Tuesday, February 10, 2015

Raspberry Pi Time-Lapse, First Movie

First shots taken- spaced one minute apart from 7am to 7pm on 2/10/15. Once the series of shots were taken, I used Microsoft Movie Maker to put together a video.

The process was very easy- basically import all the photos into Movie Maker and set the duration. I used a duration of 0.04 seconds per photo to yield about 24 frames / second. Unfortunately it was a snowy and overcast day, so it's a really boring video.


One issue that is noticeable right away is that the red camera on light shows in the photos. The Raspberry Pi camera light is very easy to turn off, see this link.

Following the link's instructions, open up the config.txt file for editing:

sudo nano /boot/config.txt 

Then add this to the end of the file:

disable_camera_led=1 

save, reboot your PI, and you are in business minus the annoying light.

Monday, February 9, 2015

Raspberry Pi Time-Lapse Camera : Go time!

In the previous post I went though a few tries to get my Raspberry Pi set up to take time-laps photos. After a few false starts I had success using the instructions on the Pi foundation's website:


I also found that my PI tended to pull the same IP every time it booted- even though I couldn't get it to successfully set it's network configuration to static. 

I was successful, however, getting it to automatically log onto my wireless network every time it booted.

I used the instructions on the raspberrypi.org website listed above to set up a crontab scheduled job to take a photo every minute. Initially I used their instructions just to test the function and made sure it worked. Then, I combined those instructions with some info on a crontab tutorial (located here) to set up a job where it would take a photo every minute from 7am to 6pm, every day of the week. This roughly corresponds to daylight hours in Minnesota right now. 

The line in crontab ended up to be:

* 07-18 * * * /home/pi/camera.sh 2>&1

The first position "*" indicates each minute
"07-18" indicates hours 0700 through 1800, every hour (24 hour clock)
The third position "*" is each day (# of days)
The fourth position  "*" is every month
the Fifth position "*" is every day of the week

I'm not exactly sure what the "2>&1" does....

After I had that set up, I shut the PI down, disconnected the monitor, keyboard and mouse, and taped the PI's camera to my sun porch window, and plugged it in. 

I was able to both SSH and sftp into the PI using the IP address I had written down earlier. I used the standard Nautilus file manager in Ubuntu 14.01 as the ftp client, and PuTTY as my SSH client. 

Tomorrow night I'll sftp in to the PI, and hopefully have a folder full of pictures to put together a movie with. 

Sunday, February 8, 2015

Raspberry Pi Time-Lapse Photo initial setup

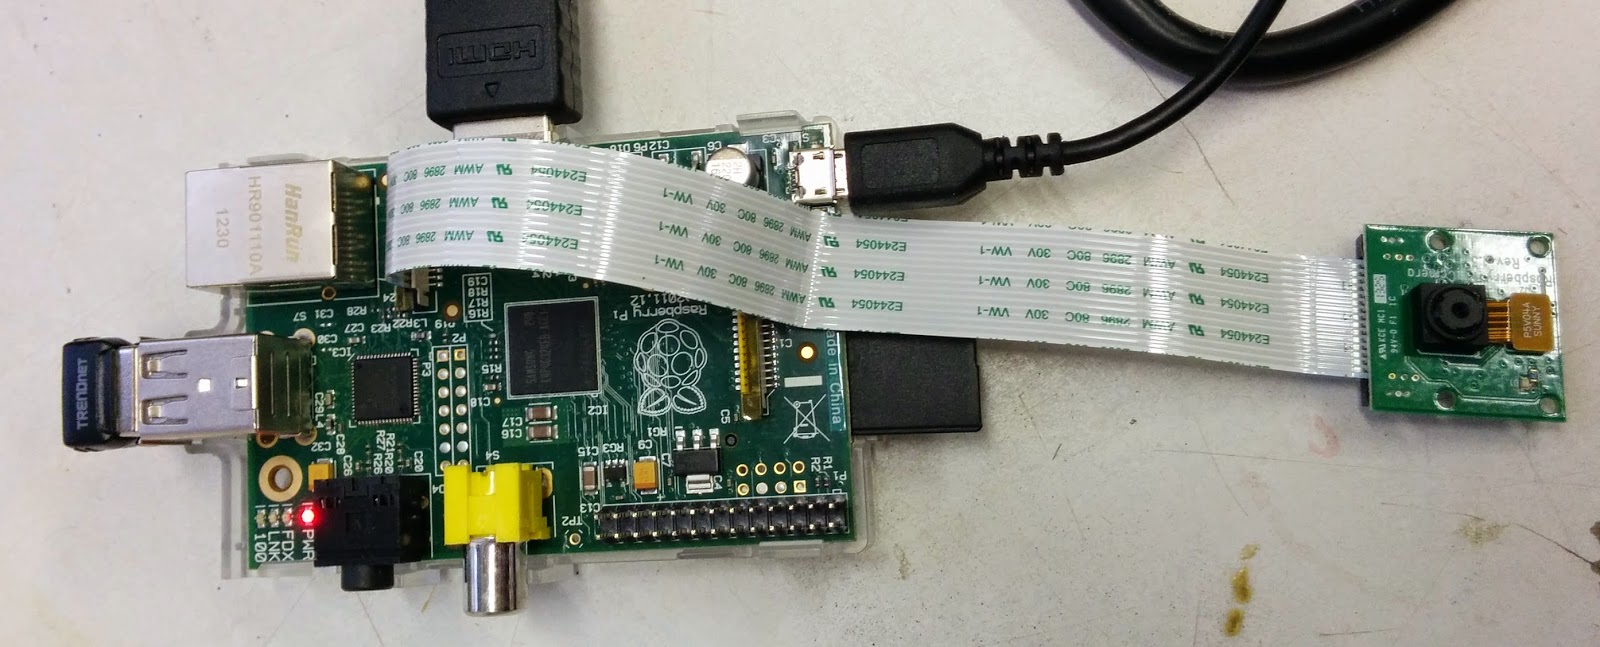
I'm finally getting around to another project that's been on my list for a long time- putting together a self-contained time-laps camera using a Raspberry Pi and camera module. I'm planning on mounting it in some sort of waterproof container and placing it outside- I hope I can catch the melting and breakup of the lake ice later this spring.

If you haven't heard of the Raspberry Pi, it's a $35 linux computer the size of a deck of cards. Head to http://www.raspberrypi.org/ for more info.


Updating the Raspberry Pi
I'm using Raspberry Pi B model. It's been sitting in a box for quite a while so the first step is to update all of the software. Open up a terminal window and fetch available updates:

sudo apt-get update

then, apply the updates:

sudo apt-get upgrade

These two commands might take a while to complete- particularly if it hasn't been done in a while.

I'm planning on having the Pi close enough to my house so it should be able to connect to my wifi network- nice for transferring files and remoting in to adjust settings, checking alignment of the camera, etc.

Setting up the Pi to automatically connect to my home wifi network (successful)
I found some instructions on how to change the Pi's network configuration so that it'll automatically connect when it turns on:

http://weworkweplay.com/play/automatically-connect-a-raspberry-pi-to-a-wifi-network/

Attempting to set up a static IP address (not successful)
I also wanted to be able to SSH into the Pi to adjust settings, etc. So, to accommodate SSH the next step after configuring the wifi to automatically connect on boot was to change the Pi to a static IP. The previous link also had instructions on how to change from dynamically assigned to static IP. Here is another link with more detailed instructions on setting up a static IP on your raspberry pi:

https://www.modmypi.com/blog/tutorial-how-to-give-your-raspberry-pi-a-static-ip-address

However, when I was trying to comment out the old versions of lines in the network configuration files, I couldn't get # to work on the keyboard- some other character would appear instead. It turns out my PI didn't have it's keyboard configured properly.

Using:

sudo raspi-config

from the command line I was able to work through the menus to reconfigure the keyboard to a standard US 104 key layout. One note- some of the menus in the raspi-config program take a very long time to load- 10 seconds or longer. So have patience- it took me several times to realize this and not think the terminal window had crashed.

Then, back to trying to get a static IP setup.... And, no luck. I went through every tutorial I could find and it just didn't work. I'll have to postpone trying to set up SSH and just get the camera working on its own.

Back to the Camera setup
next step- installing Berrycam software on the PI so I can control it with my android phone.

see:
http://www.fotosyn.com/berrycam-support/

Installed- then installed the Pi Sight app on my Nexus 5- and no dice. The app would crash almost immediately every time I tried it. I immediately uninstalled it.

Then, after looking on the play store, I tried RaspiCam Remote. That worked right away- and without anything to install on the Raspberry Pi.

After trying and failing to use the Pi Sight app along with the berrycam script, I thought I'd go back to the basics and try using a tutorial that explains the process from scratch- and I found this:

http://www.raspberrypi.org/learning/timelapse-setup/worksheet.md

Great, step by step tutorial- and explanation about what each line does!

Tomorrow- to actually take some photos.