
While I was on the lulzbot site I noticed they really upgraded their hot end- their new 2.0 version looks really nice- a machined stainless steel backer plate and aluminum heatsink. Much more industrial looking than the older version I purchased only a few months ago.
Since the new 0.25mm diameter nozzle only puts out 1/4 as much plastic per pass as my original 0.5mm nozzle, build times are longer, but the smaller output filament produces a much finer quality part. It also seems to ooze much less when heating and traversing than the original 0.5mm nozzle. I've heard clogs can be an issue with smaller nozzles but I haven't seen that yet. The new nozzle was a snap to install. I was worried about all of the solidified plastic on the inside of the old nozzle making it impossible to remove, but it came off without any trouble.
As long as I was trying to further improve print quality, I thought I'd further reduce free play in the Z-axis 3/8" ACME threaded rods. The bottom is relatively fixed by the stepper motors and the flex couplers. The X-ends attach to the rod via two large brass ACME nuts, but those nuts have some side-to-side free play. During Z traverses the top of the rods can and do trace out an orbit. This must have some effect on Z-axis precision. It's probably very minor, but why not try to reduce it as much as possible. I was able to find some nice cartridge bearings with the correct ID at D&S Machined Products for $2.50 each. NTN R6ZZ/LO14QC. These fit very nicely over the 3/8" threaded rod.

I was planning on designing and printing a slick bearing retainer, but then my father-in-law suggested I simply hot glue them in place. How can you argue with that? Quick, easy, and it'll supply a tiny amount of flex to prevent binding.
 |
| Right Side upper Z-axis bearing hot glued in place |
For a test of these two improvements, I printed a few copies of the "Pluto" dog off thingiverse. It's a nice size, has smooth compound curves, and some really tough overhangs for the ears and mouth. In short, a good test for trying to improve print quality.
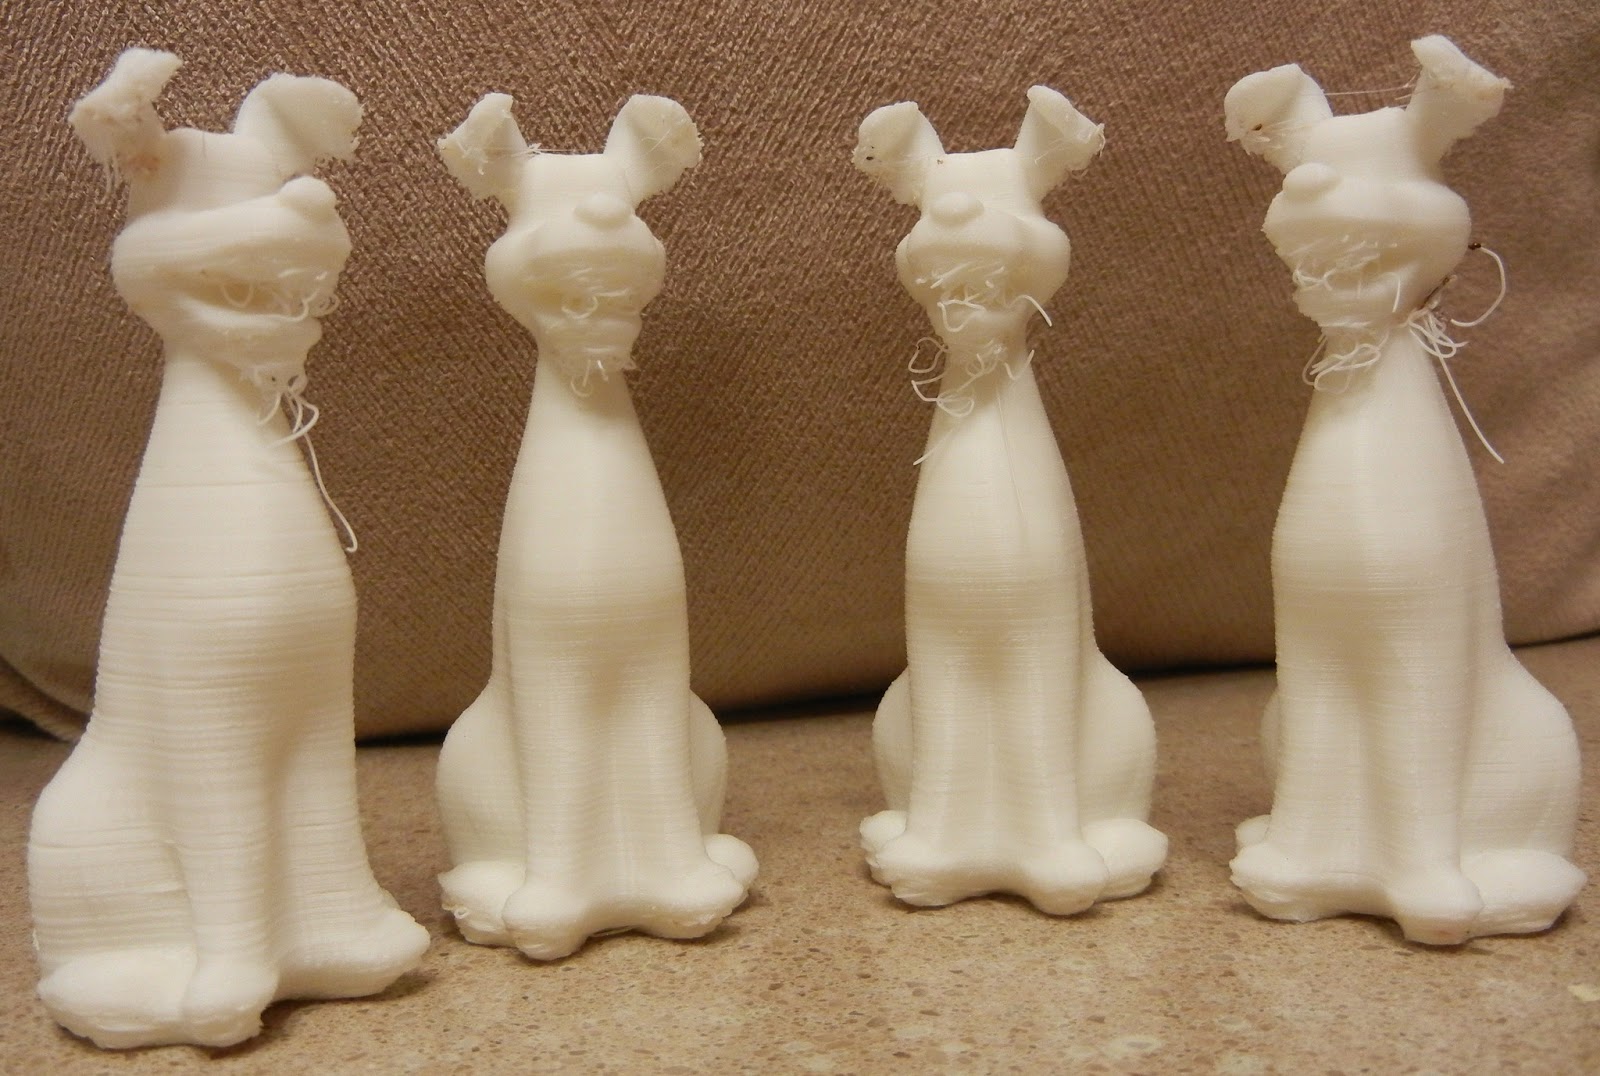 |
| The 4 Dogs, numbered left to right |
Dog #2: Since the new nozzle doesn't ooze nearly as much, I thought I'd take a chance and get rid of the Z-lift entirely. That made a huge difference- note how uniform and clean each layer is. No issues with skipping steps either. I also reduced the Bridge Flow Ratio (BFR) from 1.0 to 0.95 to try and improve the mouth and nose details. That didn't seem to help much, this dog still had bridging challenges on the mouth and ears.
Dog#3: The final two dogs were meant to fix the bridging entirely- #3 has a BFR of 0.85
Dog#4: BFR of 0.75. Minimal effect.
A fan might be required to get this dog to print nicely. Otherwise a nail file and wire clipper will clean it up nicely.
How about trying a vapor polish? Just don't leave it in there too long like I did. It's also a smart idea to let the vapor chamber fill first, before inserting your part. Otherwise the bottom of the part gets over-polished and the top gets under-polished. Here is what it looked like after 45 minutes:
 |
| Melted Dog! |
Next, now that small part performance is starting to look pretty good, I thought I'd actually do something useful with the printer. I installed some under cabinet LED lights from amazon.com. These were very nice- decently warm color, and easy to install. However, I needed a better solution to fasten the wires in place to the bottom and inside of the cabinets. Neither Home Depot or Lowes had appropriate wire clips or staples, so I thought I'd design and print my own. All of the commonly available clips are made for coax cables, CAT5, romex, etc.

These custom clips securely clamp the wire in place and attaches using a #6 flat head screw. The .STL file, part model, and dimensions are available now on thingiverse.
tags: mendelmax 1.5, rep rap


